Before starting with Animana – or after purchasing a new label printer – you need to configure your label format. This article explains how you can setup the label size and margins, and also how to add your clinic information to each label.
Before you start
This is box title
Setting up the label format is done in the general settings section of your account. Only the administrator of your account can adjust the general settings.
Settings apply to all users and all label printers (individual settings cannot be configure for different printers or users).
Step-by-step instructions
- Go to
 > General Settings > General Settings > tab Paper Format.
 - Enter the label size (in mm) appropriate for your label printer. Note that label widths from 50-100mm and heights between 25-100mm are supported.
- Enter a label margin for the top, bottom, left and right. These margins determine the space between the edge of the label and the label text.
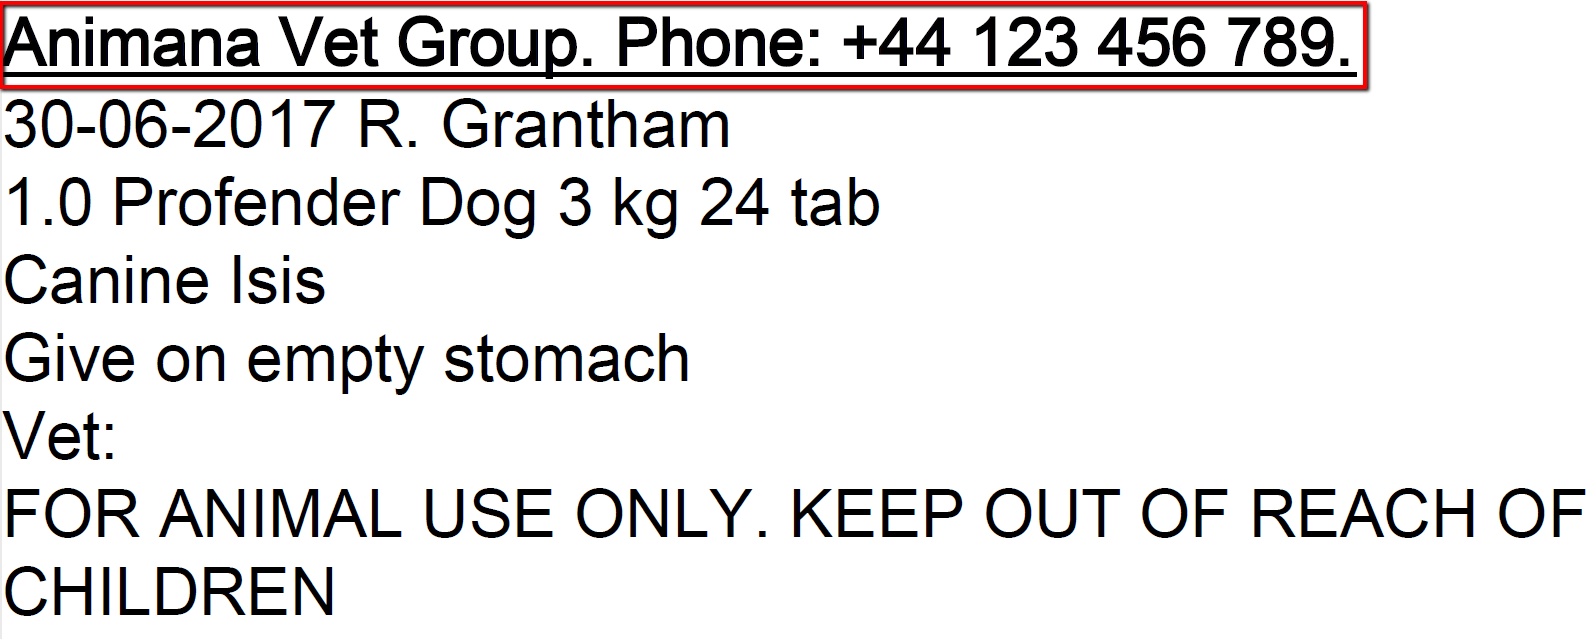
- You may enter a label header text (e.g. the practice name and phone number) to appear on labels.
Tip: the header text will appear on one line and in underlined bold text. You can use multiple lines by inserting <br> into the text, e.g. Line One<br>Line Two, but don’t add too many lines – it still needs to fit onto your label!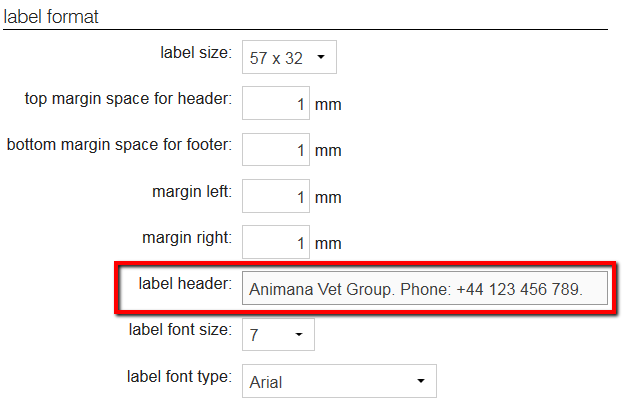
 This is box titleIf you leave label header field empty, each label header will contain your branch name, street, house number, city and phone (as defined in > General Settings > Locations).
- Click Save.