Appointment groups are the tabs in your diary. They allow you to group your appointment columns. For instance, you can create appointment groups based on practice locations or based on the animals that are treated (e.g. farm animals/pet animals). You always have one appointment group and you can create additional appointment groups if you want. This article explains how to create and set up a new appointment group.
Before you start
This is box title
- You need permission to be able to manage appointment groups. Permissions can be adjusted by practice administrators in
 > General Settings > Role Management.
 - You need to have already created appointment columns to be able to assign them to an appointment group. See the Learning Path: Diary Management for more information.
Step-by-step instructions
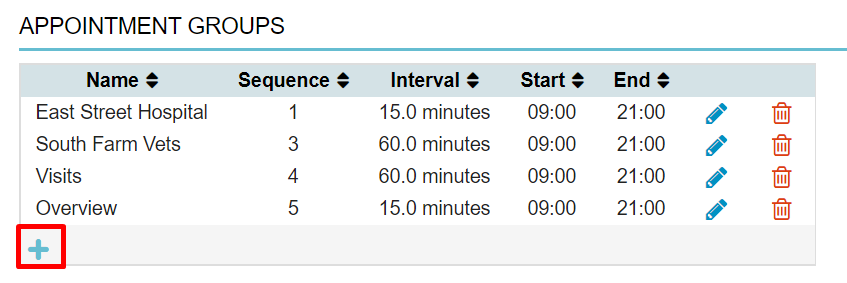
- Go to
 > General Settings > Appointment Groups.
 - Click
 at the bottom of the list to create a new appointment group.
- Give the new appointment group a name. This name will be visible in the top row of the diary, as a tab.
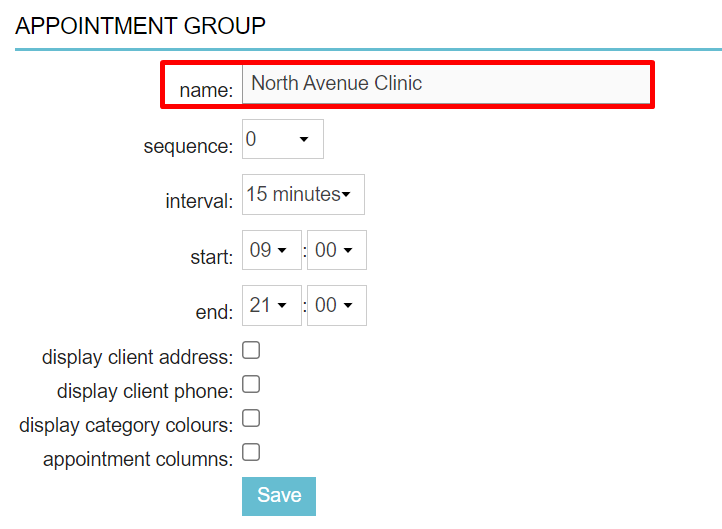
- Select a number from the list under “sequence”. The lower the number, the further to the left that tab will appear in the diary view. If multiple appointment groups have the same value, they will appear in alphabetical order.
- Under “interval” select the desired standard interval in minutes between appointments. The interval set will affect the layout of the times on the left-hand side of the diary.
- Specify a “start” time of the appointment group, (i.e. the earliest time shown in the diary view).
This is box titleTip: you could start your diary earlier than the practice opens, so that you have some extra time slots in the diary for emergencies, notes and such.
- Specify an “end” time for the appointment group, (i.e. the latest time shown in the diary view)
This is box titleAnimana automatically adds a number of time slots at the end of the day for emergencies. So if you select an end time of 21:00, the end time in the diary will be 22:00.
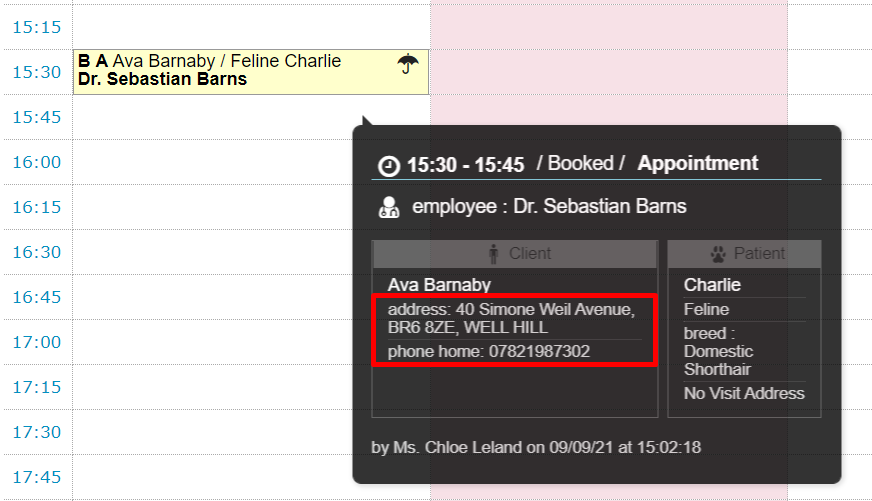
- Check “display client address” if you want to see the client’s address in a pop-up when you hover the mouse over an appointment in the diary.
- Check “display client phone” if you also want to see the client’s phone number in the aforementioned pop-up.
- Check “display category colours” if you want the colours you have chosen for the appointment types to be visible in the diary. If you leave this option unchecked, the appointments will change colour by the appointment status. If you use the appointment status colour, this gives a handy and quick overview of your diary and you can immediately see which consultations have been completed, which clients did not show, which treatments are in progress and whether payment has been made.
This is box titleCompanion animal practices usually leave this box unchecked, so that the colour changes based on the status during the patient’s visit. For farm animal practices, we usually see this checked more often so that the colour quickly tells you what type of appointments are booked in a day.
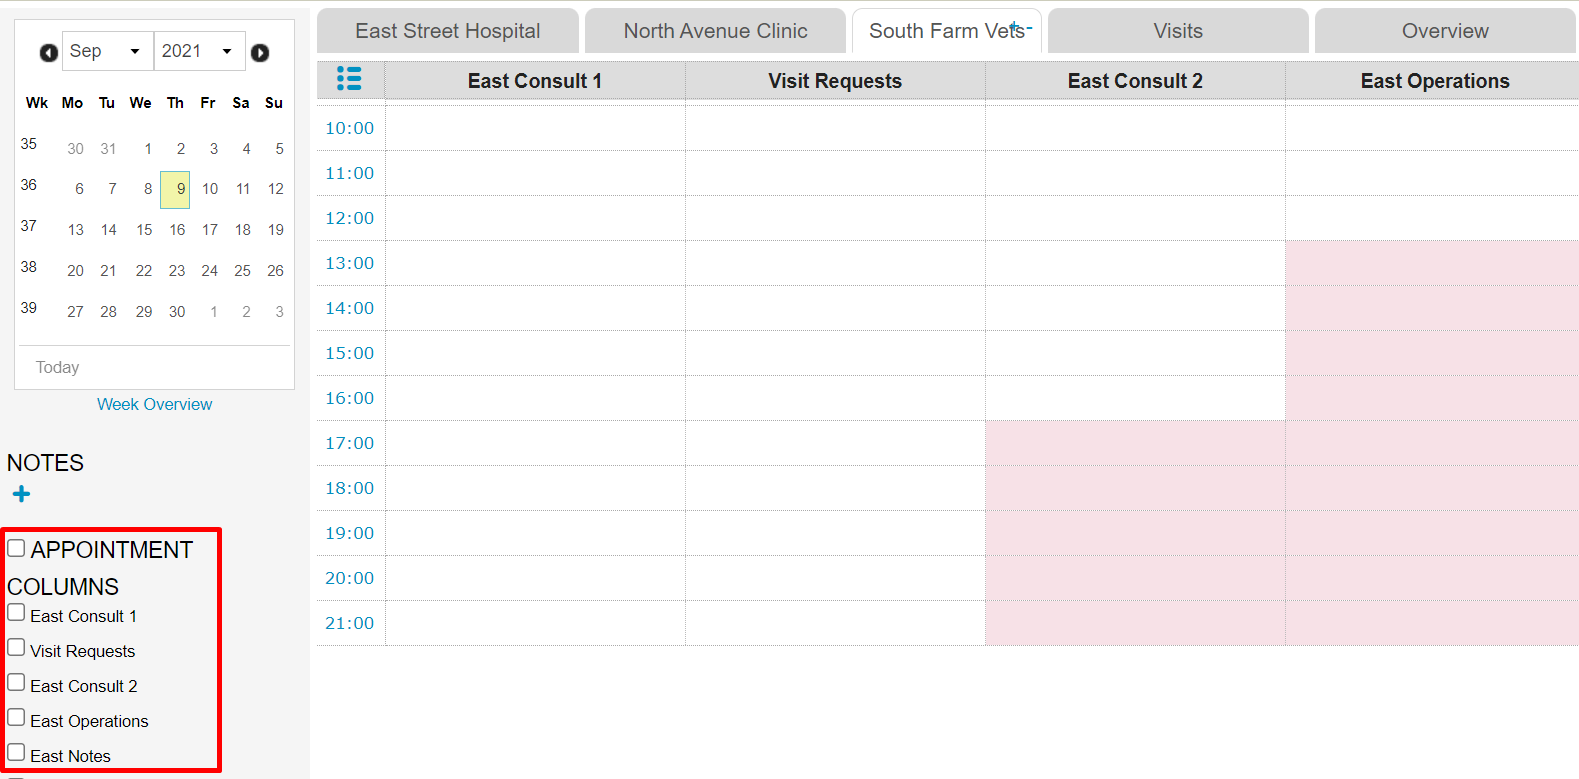
- We advise you to leave “appointment columns” unchecked. Check this option if you want all appointment columns in this appointment group to be visible by default. You can then make a selection of which columns you want to view at that moment by checking them. This is sometimes used by practices that treat farm animals. This is what it will look like in the diary:
- Click Save.
You will return to the overview of the appointment groups and see that the new appointment group has been created. In the diary, however, nothing is visible under this tab yet, because no appointment columns have yet been linked to this appointment group. How to do this can be found in the Learning Path: Diary Management.