The purpose of this article is to describe how to process a refund or credit for an unwanted service or returned product. On occasion, you simply may have made an error in the product that has been booked out. You can follow the workflow below to handle these scenarios.
Please note: this article only applies if you are working with a loyalty program in Animana. In all other cases you can read the article How do I perform a credit on an existing invoice? to read how you can process a refund or credit.
Prerequisites
Invoice should have already been paid for and closed before you would expect to process a refund/credit.
However, in some cases an invoice is open/unpaid – BUT you have already closed the VAT period. When you close the VAT period you can no longer make edits to unpaid invoices. In these scenarios, a credit invoice will also need to created to process changes (Therefore even if the invoice is unpaid).
If the invoice is unpaid, and the VAT period has not been closed:
You can simply edit the invoice and remove the products from the invoice. We recommend adding a description to the invoice explaining the reason for this action. Do not change the invoice number. Removing all the products from the invoice also makes the invoice value ‘zero’ and thus no longer remains open. NOTE: Not all users have access to make changes to invoices so please check with your administrator.
For returned products not being restocked: If not already done, create a new product called: ‘Refundable non-stockable Item’. The value of this product should be zero. (this is for scenarios where you cannot or will not re-stock the returned product). Making this product to process refunds, allows you to run reports on it later on.
Scenario 1: Customer returns a product which will go back into stock and the customer will receive the refund.
- Bring up their client file and find the invoice that contains the product they are returning. Usually a customer will have a copy of their invoice for reference.
- Open the invoice to confirm the paid amount of that specific product/products at the time of the sale. (as by the time you generate a refund you may have updated your product prices)
- If the product was booked on a specific patient , we recommend performing the refund in that patient’s file. If it was a product added to the client file then create the credit invoice on the client file. (We recommend matching the original data entry this way as it’s easier to refer to in the history if necessary)
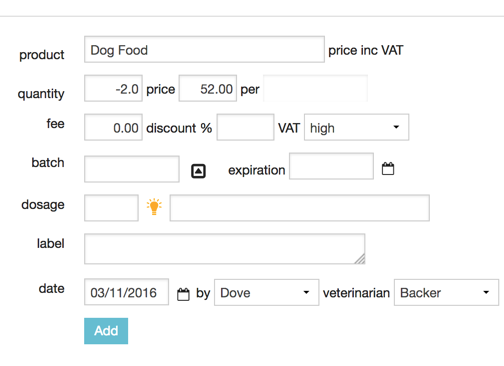
- Now add the product/service you are refunding, but with a negative quantity. For example: If a client brings back 2 x bags of dog food – In the patient file/client file, click on the product button and search for the product/service involved. (Just like you do when you sell a product/service). Instead of a positive quantity, you enter a negative quantity (i.e. -2) as further shown in the example below.
- Click Add.
- Repeat these steps if multiple products are returned.
- Click Preview Invoice.
- If needed, you can add a note in the field “description” (the description will be printed on the invoice) or “notes for debtors list”.
- Click Create Invoice.
- If you would like to set off the credit invoice against another outstanding invoice, you can tick those invoices in this screen. The total amount will be updated immediately. A positive amount means that the client should pay this amount to the practice, a negative amount means that you owe this amount to the client.
- On the right, click the respective payment type. If you are giving the refund in cash, then click Cash. If you do not want to return the money immediately but want to leave the amount open as a credit or pay it back later via the bank, then click No Payment.
- Click Finish to process the payment.
The cash refund will display in the day Overview, so it would make sense for the cash to come out of your cash register so that it matches up with your cash count later on that day.
Scenario 2: Customer returns a product which will go back into stock and the customer will use the refund as credit.
- Bring up their client file and find the invoice that contains the product they are returning. Usually a customer will have a copy of their invoice for reference.
- Open the invoice to confirm the paid amount of that specific product/products at the time of the sale (as by the time you generate a refund you may have updated your product prices).
- If the product was booked on a specific patient , we recommend making the credit invoice in that patient’s file. If it was a product added to the client file then create the credit invoice on the client file. (We recommend matching the original data entry this way as it’s easier to refer to in the history if necessary)
- Now add the product/service you are refunding, but with a negative quantity. For example: If a client brings back 2 x bags of dog food – In the patient file/client file, click on the product button and search for the product/service involved. (Just like you do when you sell a product/service). Instead of a positive quantity, you enter a negative quantity (i.e. -2) as further shown in the example below.
- Click Add.
- Repeat these steps if multiple products are returned.
- Click Preview Invoice.
- If needed, you can add a note in the field “description” (the description will be printed on the invoice) or “notes for debtors list”.
- Click Create Invoice.
- Select the bold invoice.
- On the right, click No Payment.
- Click Finish at the bottom.
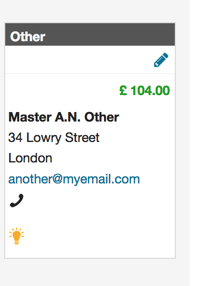
The credit amount will now show in ‘green’ in the client file.
Scenario 3: Customer returns a product which will not go back into stock and the customer receives a refund
- Bring up their client file and find the invoice that contains the product they are returning. Usually a customer will have a copy of their invoice for reference.
- Open the invoice to confirm the paid amount of that specific product/products at the time of the sale. (as by the time you generate a refund you may have updated your product prices)
- If the product was booked on a specific patient , we recommend making the credit invoice in that patient’s file. If it was a product added to the client file then create the credit invoice on the client file. (We recommend matching the original data entry this way as it’s easier to refer to in the history if necessary)
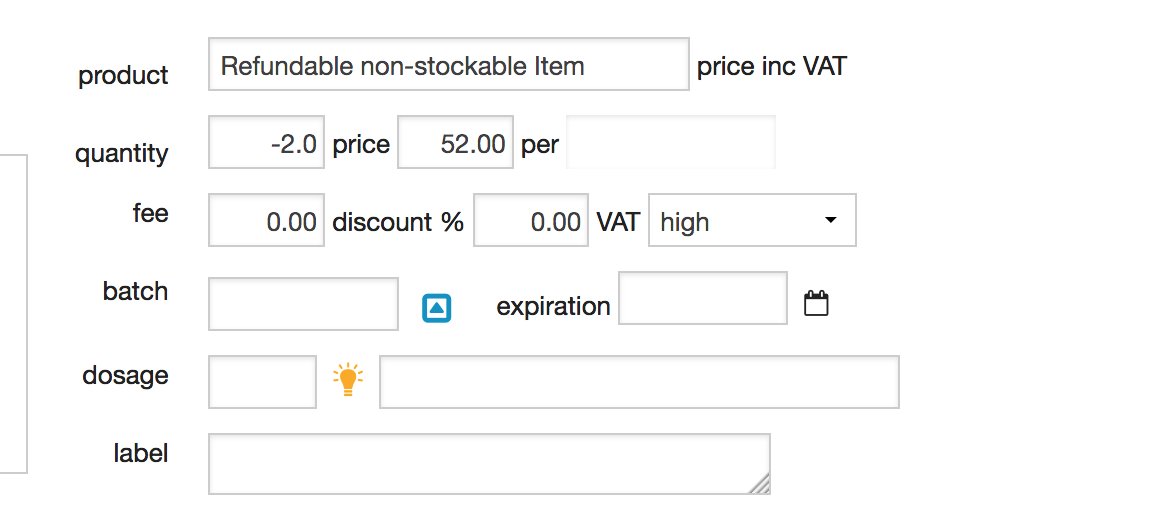
- Now search for the product ‘Refundable non-stockable Item’ (if not already created, please create a product with this name – the product value should be zero). Instead of a positive quantity, you enter a negative quantity (i.e. -2) as further shown in the example below. The negative quantity represents the goods being returned.
- Click Add.
- Click Preview Invoice.
- Click Create Invoice.
- Select the bold invoice.
- On the right, click the respective payment type. If you are giving the refund in cash, then click Cash. If you do not want to return the money immediately but want to leave the amount open as a credit or pay it back later via the bank, then click No Payment.
- Click Finish.
The cash refund will display in the day Overview, so it would make sense for the cash to come out of your cash register so that it matches up with your cash count later on that day.
Scenario 4: Customer returns a product which will not go back into stock and the customer will use the refund as credit
- Bring up their client file and find the invoice that contains the product they are returning. Usually a customer will have a copy of their invoice for reference.
- Open the invoice to confirm the paid amount of that specific product/products at the time of the sale. (as by the time you generate a refund you may have updated your product prices)
- If the product was booked on a specific patient , we recommend making the credit invoice in that patient’s file. If it was a product added to the client file then create the credit invoice on the client file. (We recommend matching the originally data entry this way as it’s easier to refer to on the history if necessary)
- Now search for the product ‘Refundable non-stockable Item’ (if not already created, please create a product with this name – the product value should be zero). Instead of a positive quantity, you enter a negative quantity (i.e. -2) as further shown in the example below. The negative quantity represents the goods being returned.
- Click Add.
- Click Preview Invoice.
- Click Create Invoice.
- Select the bold invoice.
- On the right, click No Payment.
- Click Finish at the bottom.
The credit amount will then show in ‘green’ in the client file.