If you are managing (a group of) users that require access to a small part of Animana, you can use the role management functionality to create roles with the necessary permissions. These roles can then be added to specific users. This article will explain how to create user roles with specific permissions.
Step-by-step instructions
- First, browse to
 > General Settings > Role Management and you see a page similar to this (the page is actually a lot longer, but we have cropped the image for improved readability):
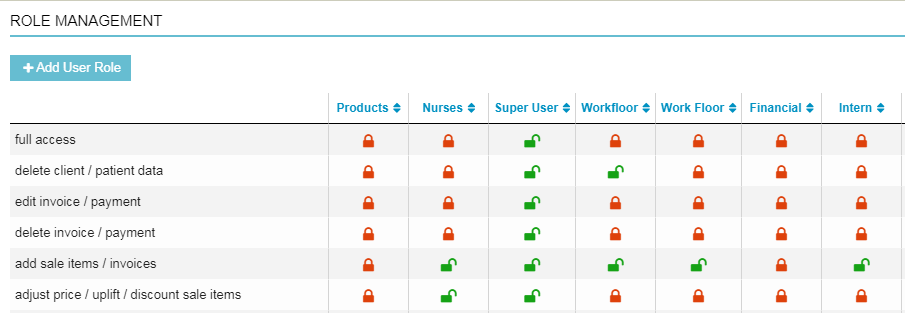
- Here you will find all the roles created on your account. At the top of the list, the name of the role will be displayed, and on the left side the names of the permissions. The green and red locks indicate whether a role can perform the permission; a green padlock shows permission to access and change this area, a red and closed padlock shows that this permission is locked for this role. To toggle between the two permissions, simply click the padlock icon.
- Proceed by clicking on the Add User Role button at the top of the page.
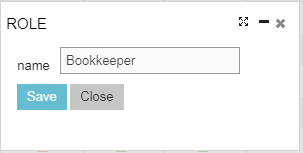
- A pop-up will appear where you can type the name of this Role. Once you are done, click Save.
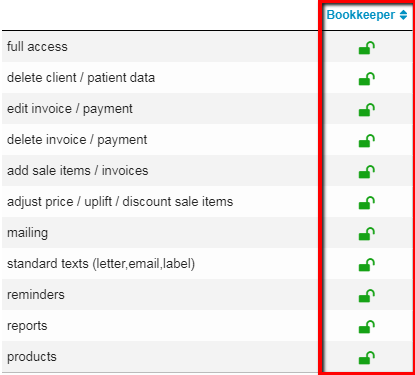
- The role will be added to the list and will have all permissions by default:
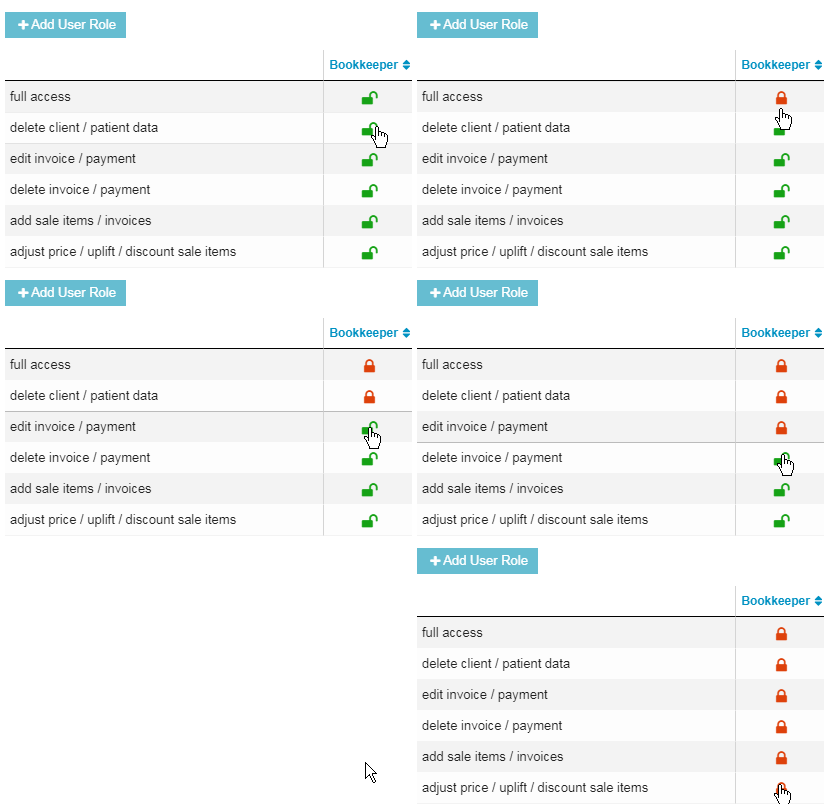
- Since we are creating a role for the bookkeeper, we will create a role that will allow all users with this role to only use the financial functionalities in Animana. Disabling or enabling the use of functionality can be done by simply clicking on the locks as shown below:
- Now you can assign the role to one of your users. Note: If you want to delete one of the roles, click on the
 -icon at the bottom of the role.
More about this
Detailed information about the permissions
Each row represents an area of the Animana system for which you can control access permissions. A green and open padlock represents that the role has permission to access and change this area, a red and closed padlock shows that the role does not have permission in this area. To toggle between the two permissions, simply click the padlock icon.
| Full access | The ability to access all administration settings such as user management and creation. |
| Delete client/patient data | The ability to modify entries in client and patient records and permission to delete client and patient records. Once a client has invoices or patients added to them they cannot be deleted, not even if you have full access to the system. |
| Edit invoice/payment | Permission to edit invoices and payments. Once an invoice is completed you are (officially) not allowed to edit it. You can edit the payment details of an invoice on the day of the payment only. If editing is allowed, you can edit previous payments as well. |
| Delete invoice/payment | Permission to delete invoices and payments. Again, once an invoice is completed you are (officially) not allowed to delete it. If permission is granted, you can delete payments. |
| Add sale items/invoices | The ability to register sales and create invoices. Note: excludes the ability to adjust prices, surcharge or to provide discounts. |
| Adjust price/surcharge/discount sale items | The ability to register sales and create invoices, including the ability to adjust prices, surcharge and provide discounts. |
| Mailing | Permission to create and send mailings. |
| Standard texts (letter, email, label) | Permission to add, edit and delete standard texts for e-mails, letters and labels. |
| Reminders | Permission to manage reminders. |
| Reports | Permission to see reports. Give permission to whoever is managing your stock. Note: this will also give them permission to view some of the financial reports. |
| Products | Permission to manage product info and price. |
| Stock | Permission to manage stock. |
| Financial | Ability to enter financial information and access balance and profit/loss account. |
| Financial – debtors | Permission to see and manage debtors. |
| Financial – entry invoices | Permission for entry of purchase invoices. |
| Financial – entry cash/bank | Permission for entry of cash/bank transactions. |
| Financial – monthly accounts | Manage the access to the monthly accounting. |
| Day overview list | Permission to view day overview list. |
| Day overview | Permission to create and see day overviews. |
| Day overview – book receipt/withdrawal | Permission to book a cash withdrawal. |
| Day overview – book receipt | Permission to book a receipt. |
| Schedule | This permission gives access to view all schedules. |
| Delete appointment | Right to delete appointments. |
| Scheduling | Permission to manage employee scheduling. |
| Custom protocols | Permission to add, edit and delete custom protocols. |
Assigning a role to a user
A role can be added to a user by browsing to ![]() > General Settings > User Management and clicking on the appropriate user. Once the user details appear, you can change the role:
> General Settings > User Management and clicking on the appropriate user. Once the user details appear, you can change the role:
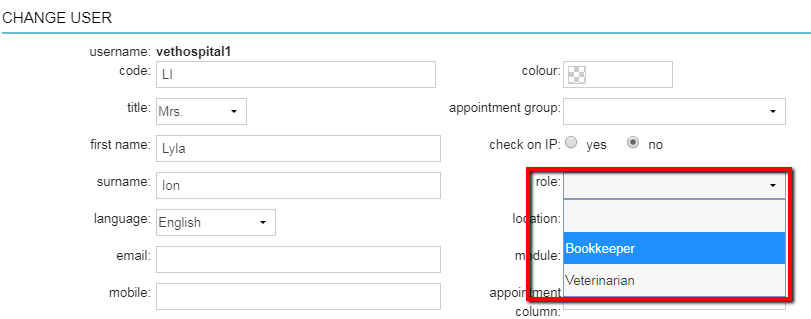
Make sure to click Save once you have assigned the role.
