Whether you have received a new price list from your supplier or just want to make a periodical price adjustment, you can easily change your prices in IDEXX Animana. This article will explain how you can update your product prices.
Before you start
- Make sure to save your current pricing in Excel before actually updating your prices; once prices are modified, they are final and the old prices cannot be recovered!
- If you want to increase prices based on a supplier’s price list, first check whether it is available in Animana. How do I do that?
- If you want to increase prices by a percentage, you must first create a so-called markup. See the Related articles for more information.
- You need to have permission to be able to manage prices. User permissions can be adjusted by your practice administrator in Settings > General Settings > Role Management.
Step-by-step instructions
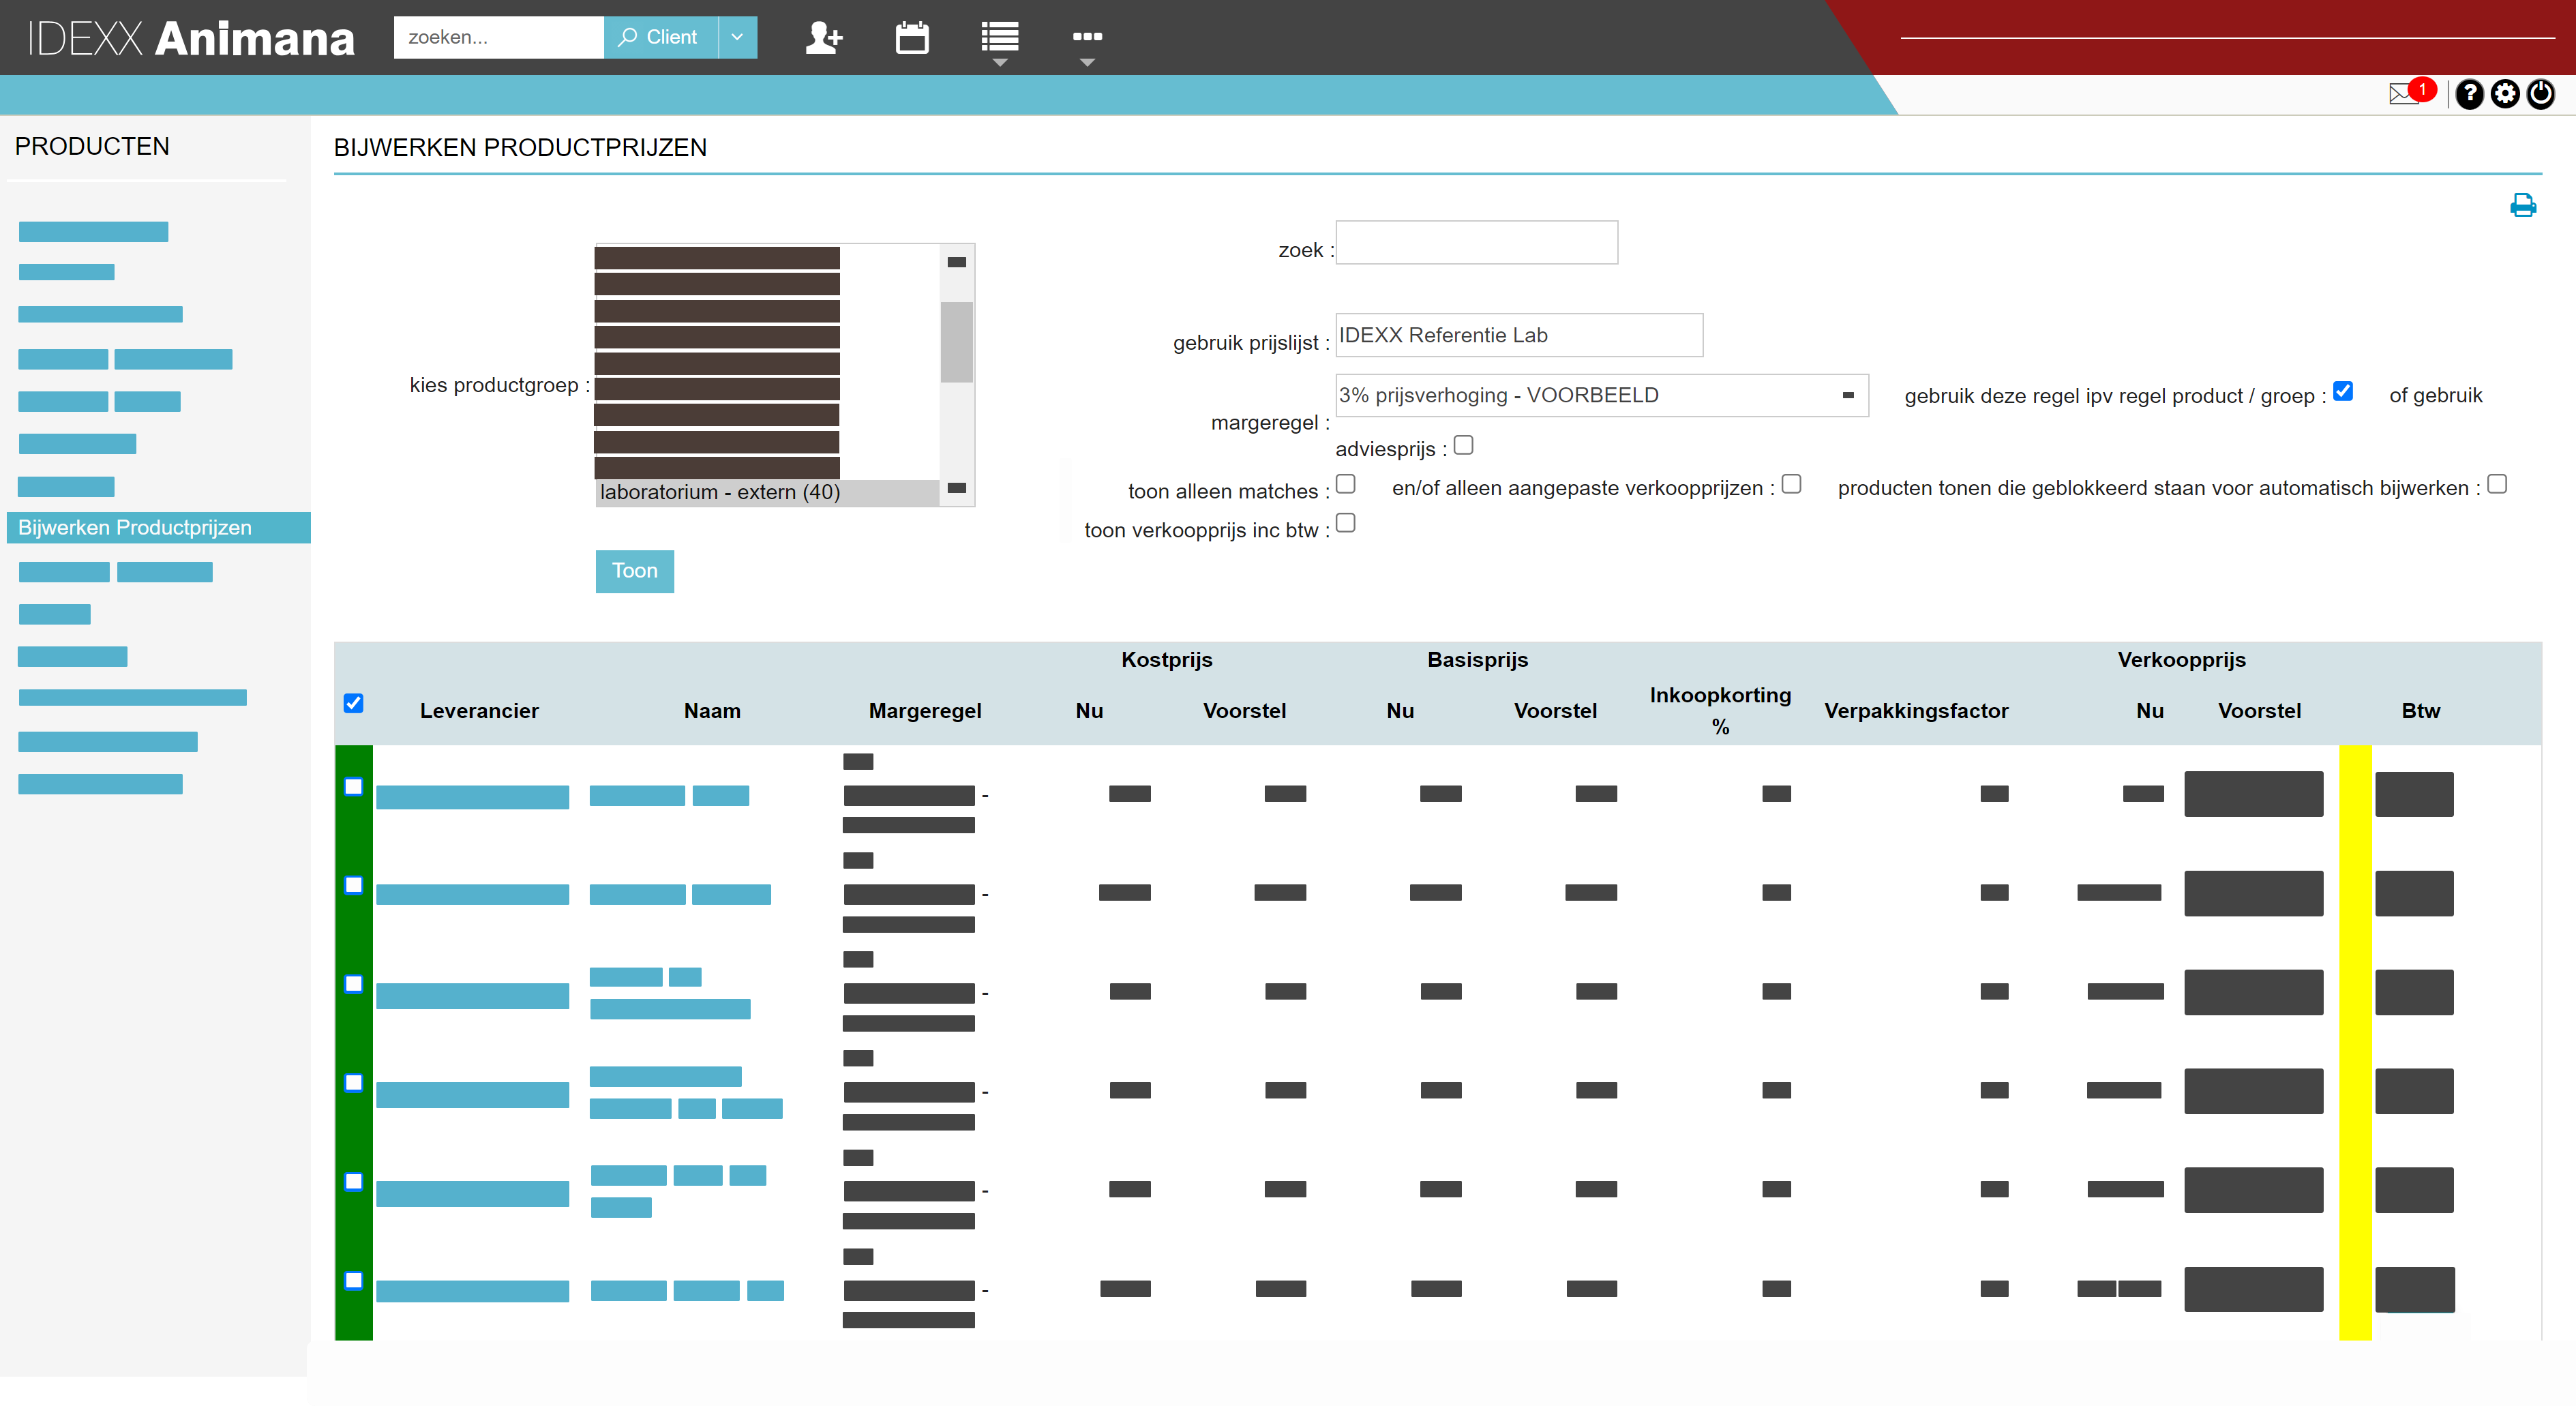
- Go to Extra > Products > Update Product Prices.
- If you want to adjust the prices of an entire product group, select the relevant product group in the “Choose product group” field. In our example, this would be the product group “Laboratory – external”.
- If you don’t use product groups, enter the product name of the product you want to adjust in the field “search” on the top right.
- If you are using a supplier’s price list to adjust your prices, select that price list in the dropdown menu next to “Use price list”. Otherwise, leave it set to “none”.
- In the dropdown menu next to “Markup”, select the desired markup to adjust your prices.
- If the selected markup is different from the markup set as the general markup on the product or product group, check the option “overrule rule of product/group”.
- Review the meaning of the other available options here and select the options you wish to apply.
- Click Show.
- At the bottom of the screen, a list of products that match your settings from steps 2–7 above will appear.
- In the first column, select the products to which you want to apply the price adjustment. You can select all products at once by clicking the checkbox in the top left corner of the table, or select individual products by checking the box on that row. This is box titleDo you see a green cell around the checkbox? This means the product is also included in your selected price list (step 4).
- Look at the colours to the right in the table, between the “Sales Price Proposition” column and the “VAT” column. The colour code indicates the differences between the current sales price and the proposed sales price. If you see red or blue here, double-check whether you want to finalize this adjustment. Read more information about colour codes here.This is box titleImportant: Save your current prices in Excel before actually updating them; once prices are adjusted, they are final, and even we cannot reverse the change.
- If you are happy with the proposed new sales price, click Save at the bottom of the table to apply the price changes to the selected products.
More about this
How can I check if a supplier’s price list is available in Animana?
- Go to Extra > Products > Update Product Prices.
- At the top right, click on the dropdown menu next to “Use price list”.
- The dropdown menu will display which suppliers have made their price list available in Animana.
Tip: If a date is shown next to a price list, this indicates the date on which the price list was created by the supplier. This way, you always know which price list version you are using. This is important because you want to update your current sales prices based on the cost prices you are paying the supplier for your products. i.e. if your supplier has increased their cost prices, you will want to reflect those changes in your sales prices.
Why should I use a markup and how do I create one?
In a way, a markup is a formula that you can apply to your prices. This formula can, for example, include a fixed number (amount) or a percentage. You then apply this markup to your products/services.
It is not mandatory to use markups; if you prefer to update prices manually, one by one, that is also possible. However, by using a markup, you save a significant amount of time.
You can create as many markups as you like, edit or delete them if needed, and apply them to different products and/or product groups. More information can be found in the Related articles.
What do the fields in the screen “update product prices” mean?
Tip: in the line below, select to show “25 entries per page” instead of 10. This will allow you to see all the data in the table.
| Field | Description |
|---|---|
| Choose product group | If your practice uses product groups in Animana, you will find the available product groups in your account in the selection block behind the ‘select product group’ field. If you select a product group here, after completing the steps you will see an overview of the products in this product group with a proposal for a new sales price. |
| Search | If you do not wish to adjust the prices of a product group, you can search for products using this search field. Enter the name of the product. |
| Use price list | An overview of suppliers who have made their price lists available to Animana. Select a price list if you wish to use it to update your prices. |
| Markup | Select the markup you want to apply. You will find more information about markups in the Related articles. |
| Overrule rule of product / group | Select this option if the price increase you just selected should be used instead of the general margin rule set for the product/product group. |
| Show only matches | If you use a price list from the "use price list" dropdown menu and tick the "show only matches" option, only results that match your product database and the selected price list will be displayed; the match is based on the supplier code. |
| And/or only changed sales prices | If you use both a price list from the "use price list" dropdown menu and a markup, and then select this option, only products with a custom sales price will be displayed. |
| Show blocked auto updates | Only products for which automatic blocking of price adjustments has been set will be displayed. |
| Show sales price inc VAT | By selecting this option, the prices in the sales price column will be displayed including VAT. |
| Supplier | After clicking on Show, you will see the supplier of the product in this column, as set in the ‘Order info’ tab of the product. |
| Name | This column shows the name of the product, as entered in the "name" field for the product. |
| Markup | This column shows which markup was used to calculate the proposed new sales price for the product. |
| Cost Price Now | This column shows the current cost price of the product. The cost price is the price you have agreed with the supplier, and may be lower if, for example, you receive a discount from your supplier. |
| Cost Price Proposition | This column shows a different price if the price list of the selected supplier contains a different price for this product (for example, if the supplier has adjusted its prices). |
| List Price Now | This column shows the current list price of the product. The list price is the catalogue price of a product. |
| List Price Proposition | This column shows a different price if the price list of the selected supplier contains a different price for this product (for example, if the supplier has adjusted its prices). |
| Discount % | This column shows whether and what discount you receive from your supplier. This is not imported from the selected price list, but this information comes from your own product database. |
| Package Factor | This column shows the number of sales units that together form a cost price unit. For example, a product may be purchased from a supplier in a box of 20 items, but the sales unit may be 1, because it is sold individually; in that case, the package factor is 20. |
| Sales Price Now | This column shows the current sales price for a sales unit. |
| Sales Price Proposition | This column shows the suggested sales price based on your settings at the top of the screen (price list, markup, and VAT). |
| VAT | This column shows the VAT as set for the product. |
What do the colours in the table mean?
- Green: If a product in the first column of the table has a green box around the checkbox, it means the product is recognized as being on your selected price list (step 4). The recognition is based on the supplier code.
- Blue: If a product shows a blue box in the second-to-last column, it means the proposed new sales price is lower than the current sales price.
- Yellow: If a product shows a yellow box in the second-to-last column, it means the proposed new sales price is 0–5% higher than the current sales price.
- Orange: If a product shows an orange box in the second-to-last column, it means the proposed new sales price is 5–10% higher than the current sales price.
- Red: If a product shows a red box in the second-to-last column, it means the proposed new sales price is more than 10% higher than the current sales price.
Can I also use this to increase the prices of my services (consultations, etc.)?
Yes, you can do that as follows:
Note: First save your current prices in Excel before actually updating them; once prices are updated, the changes are final, and we cannot reverse them.
- On the Update Product Prices page, select the product group containing your services in the “choose product group” field. If you don’t use product groups, enter the name of the service in the “search” field on the right-hand side.
- In the “markup” dropdown, select the desired markup to adjust your prices.
- Tick any other options you wish to apply.
- Click Show.
- At the bottom, a list of services matching your settings above will appear.
- In the first column, select the services you want to update the prices for.
- Look at the colours on the right in the table, between the “Sales Price Proposition” column and the “VAT” column. The colour code indicates the differences between the current sales price and the proposed sales price. If you see red or blue here, check carefully whether you want to apply that change permanently. More information about the colours can be found here.
- If you’re happy with the proposed new sales price, click Save at the bottom of the table to apply the price changes for the selected services.
I’ve updated my prices, but I’d also like to adjust those prices on uninvoiced lines. Is that possible?
When you update your prices, there are likely uninvoiced lines in your account. This means there are products and/or services listed on the “Uninvoiced” tab that have not yet been invoiced. Naturally, once the invoice is created, you’d prefer to charge the new price instead of the old one.
Fortunately, after updating your product prices, it is possible to update the prices of uninvoiced lines, provided the new product price is not €0.00 or a negative amount. You can request this change free of charge via the “Request a price correction” form on the Account Requests page.