Appointment columns are the columns shown in each tab (appointment group) in your diary. When setting up your diary, you need to specify which columns you want to see under which tab (appointment group). This article will explain how to add a column to the desired tab in your diary.
This is box title
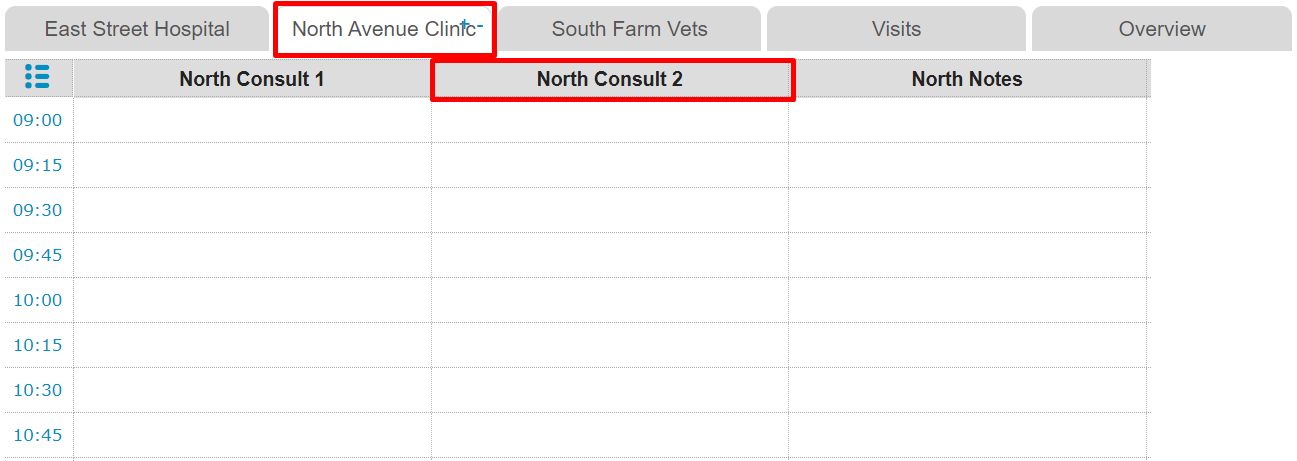
An example of appointment columns in the diary:

Before you start
This is box title
- You need permission to be able to manage the diary. Permissions can be adjusted by practice administrators in
 > General Settings > Role Management.
 - Before you continue, make sure that the appointment groups and appointment columns that you wish to link have already been created in your account. If not, please refer to our Learning Path: Diary Management.
Step-by-step instructions
- Go to
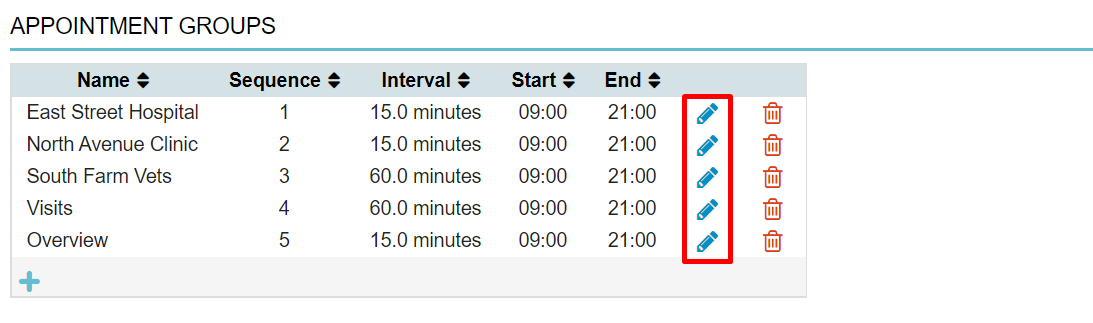
 > General Settings > Appointment Groups.
 - Click the pencil icon by the name of the appointment group (tab) you wish to add columns to.
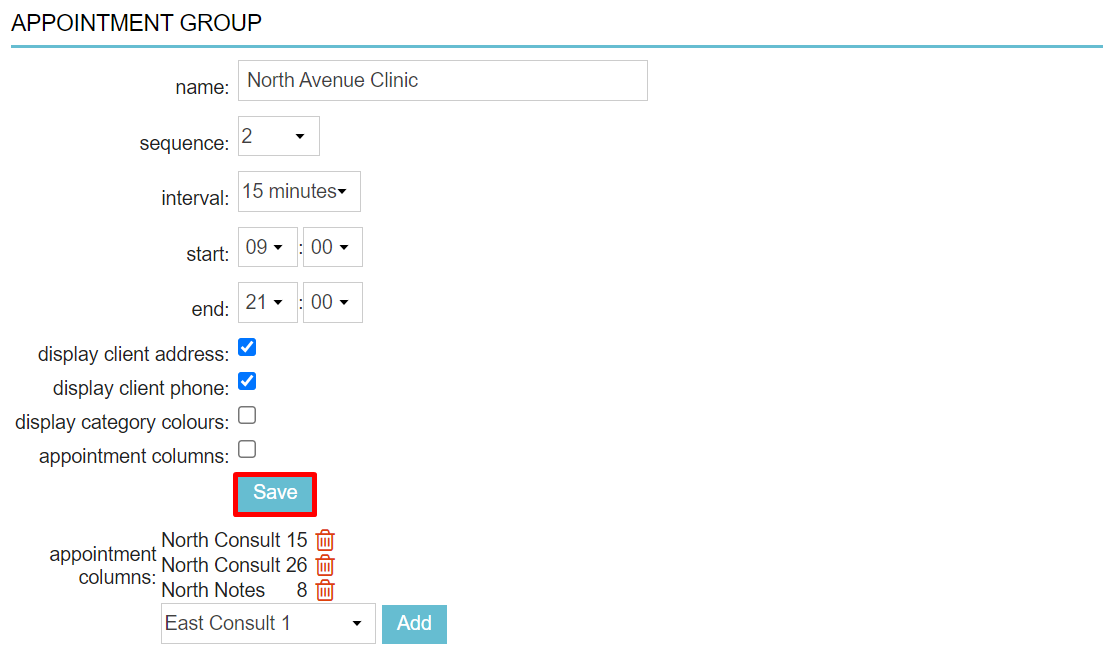
- Scroll down to the section “appointment columns”.
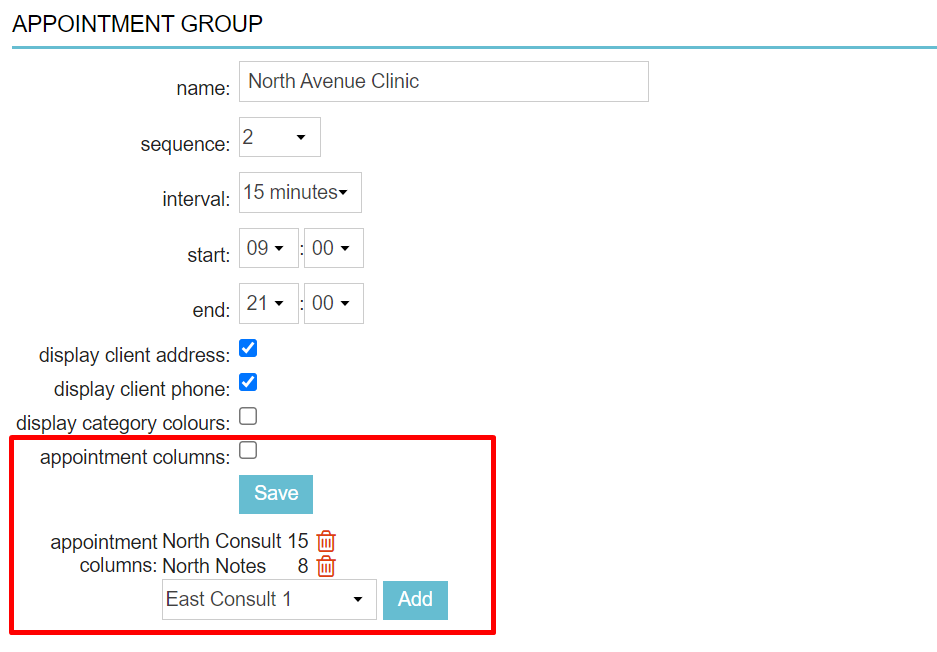
- Click the drop-down menu and select the appointment column that you wish to link to this appointment group.
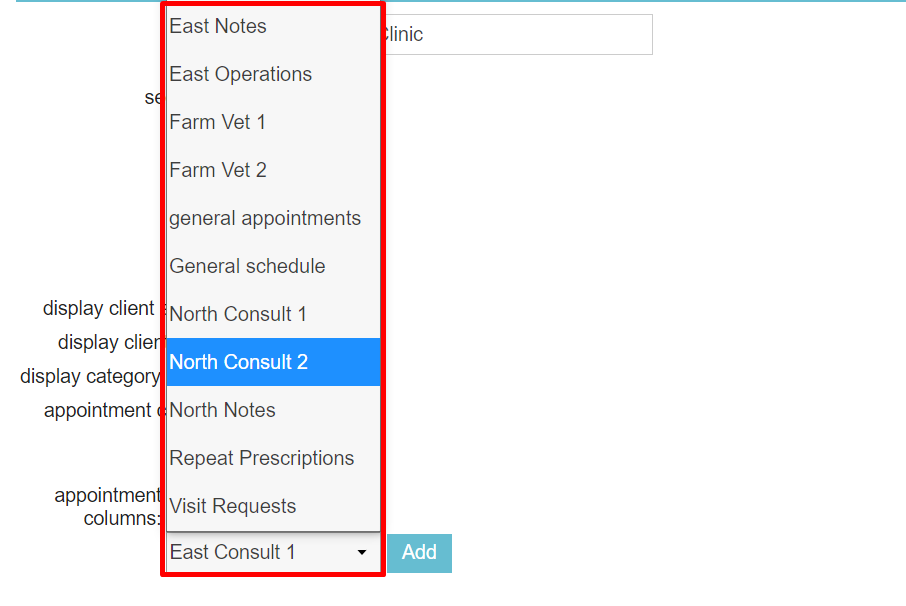
- Click Add.
- Repeat steps 4 and 5 if you want to link multiple appointment columns.
- Click Save.
This is box title
In this example, the new appointment column “North Consult 2” has now been added to the linked appointment columns in the appointment group “North Avenue Clinic”. This is what it looks like in the diary: