Unfortunately, it’s not an exception when an X-ray is accidentally scheduled in for less time than needed, but by using appointment types in Animana this problem will be history!
Appointment types allow you to define a specific type of appointment with a default duration (and other settings). For example, you could create an appointment type “X-ray”, which defaults to the correct duration. This article explains how to create appointment types.
Before you start
You need permission to be able to manage appointment types. Permissions can be adjusted by practice administrators in ![]() > General Settings > Role Management.
> General Settings > Role Management.
Step-by-step instructions
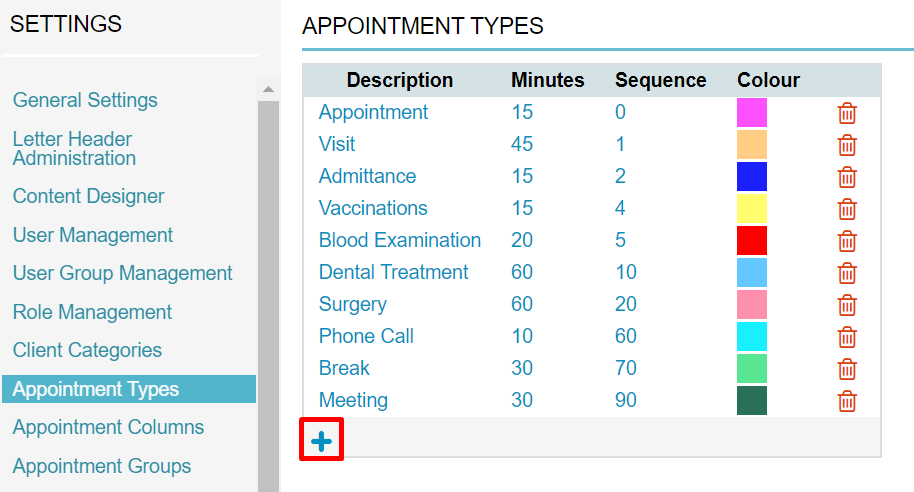
- Go to
 > General Settings > Appointment Types.
 - Click
 at the bottom of the list.
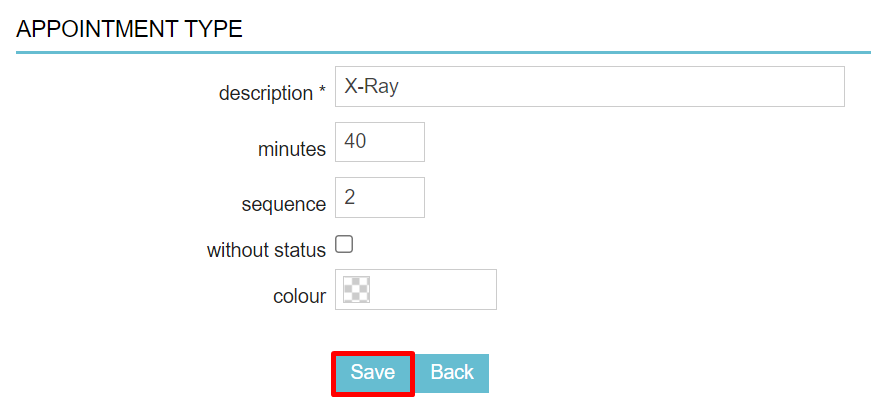
- Name the new appointment type in the field “description”.
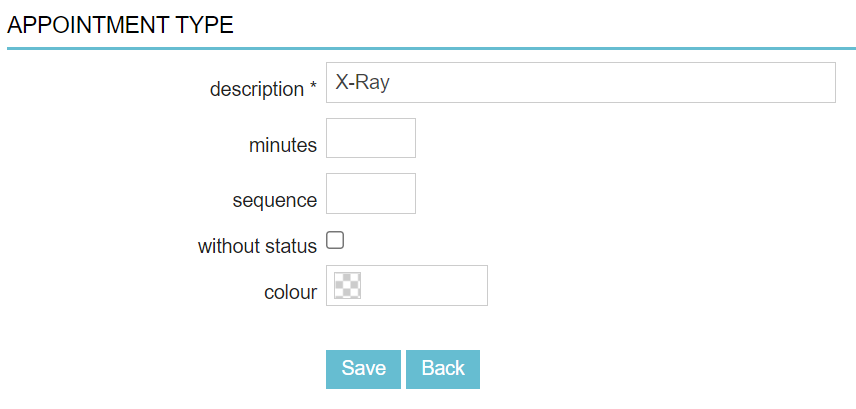
- Enter a default duration in the field “minutes”.
This is box titleWhen you select an appointment type while creating an appointment in the diary, you can always manually adjust the duration if necessary. - Enter a number in the “sequence” field. This will determine the order in which the appointment type is displayed in the drop-down menu. The lower the number, the higher up in the drop-down it will be displayed.
 This is box titlePlease note that if appointment types share the same value, they will be alphabetically ordered.
 - If you use the colour change based on appointment status (booked, arrived, in progress, payment, etc) leave the box “without status” unchecked (see the “More about this” section below for more information). If you do check the box, an appointment with this appointment type will be shown in the colour selected (see step 7). You can choose this option for appointment types like ‘break’, ‘meeting’ or ‘notes’.
- If you do not use the colour change based on appointment status, click in the field and use the colour picker to set a colour to this appointment type:
This is box titleNote: The colour only becomes visible if you activate the option “display category colours” in the appointment group. - Click Save.
More about this
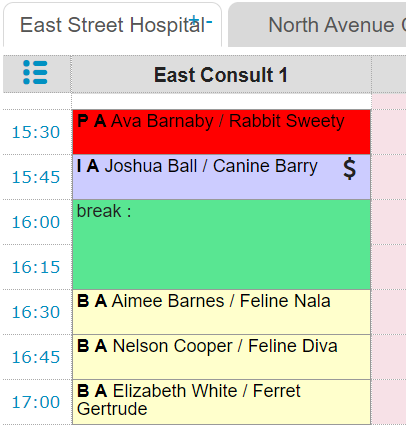
What does the “without status” option look like in the diary?
You can design your diary to either show colours by status change (booked, arrived, in progress, payment, etc) or by appointment type.
If you check the “without status” box then you turn off the status functionality for this appointment type. This means you are not able to update status of your appointment, please see the comparison below:

As you can see the status functionality disappears on the appointment when you check the “without status” box. Using the “without status” functionality might come in handy when you have appointment types such as lunch or free time periods.