The IDEXX VetLab Station (IVLS) is a laboratory information management system. It serves as a central hub for managing laboratory results, integrating with analyzers, and sharing information with Animana. In this article, we explain the configuration for the integration between IDEXX VetLab Station (IVLS) and Animana, allowing you to send an in-clinic analysis request from Animana to your IDEXX analyzer.
Before you start
- Contact our Customer Support team to activate the IDEXX module (free of charge) in your Animana account.
- To make the integration between Animana and your IVLS work, you will need two software programs: Interlink (this sends the in-clinic analysis request from Animana to the IVLS; Interlink will be configured by our Customer Support team) and WebAgent (this program retrieves the test results from your IVLS and links them to the correct patient file in Animana). You will need to install the WebAgent yourself; see the related articles for instructions.
- You need permission to be able to access settings. Permissions can be adjusted by practice administrators in
 > General Settings > Role Management.
Step-by-step instructions
- Go to > General Settings > IDEXX.
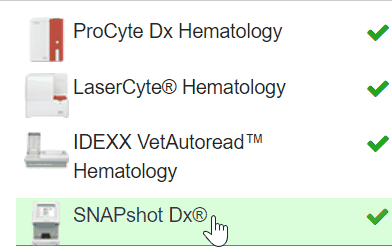
- You will see a list of IDEXX analyzers.
- Check the analyzers available at your practice location (green checkmark) and uncheck the analyzers you do not have available (grey checkmark).
- Click Save at the bottom.
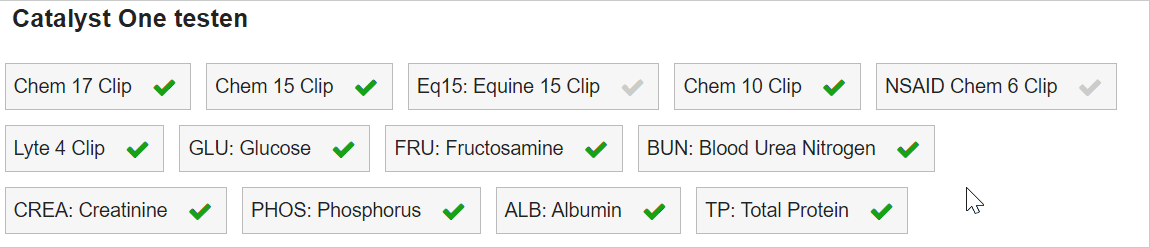
- Click on the name of the analyzer to see the list of associated tests.
- Check the tests that you perform in your practice and uncheck the tests that your practice does not perform.
- Click Save at the bottom.
- Repeat this process for all active analyzers in the list.
More about this
Can I change the order in which the analyzers are shown?
If you have multiple analyzers, you can change the order in which they are shown. This can save you time because it’s easier to find frequently used tests.
- Go to > General Settings > IDEXX.
- Drag and drop an analyzer from where it currently is in the list, to where you would like it to be. You should see the list re-order as you move the analyzer up or down the list.
- Click Save at the bottom.
Can I change the order in which tests are shown?
Yes, you can.
- Go to > General Settings > IDEXX.
- Click the name of the analyzer that you wish to change the order of the tests for.
- Drag and drop a test from where it currently is in the list, to where you would like it to be. You should see the list dynamically re-order as you move the test through the list.
Can I add or change a custom analyzer?
Animana allows you to create custom analyzers allowing you to personalise the system to the way your clinic works.
- Go to > General Settings > IDEXX.
- At the bottom of the analyzers list, click Add Custom Analyser.
- A new analyzer will appear at the bottom of the list, called “custom analyser 1”.
- Click on the pencil icon behind “custom analyser 1” to edit the name.
- Click Apply.
- Click Save at the bottom.
How do I delete a custom analyzer?
- Go to > General Settings > IDEXX.
- Scroll to your analyzer and click the delete (
 ) icon behind it to remove this analyzer.
 - Click Save at the bottom.
How do I add or change a custom test (or panel)?
Animana allows you to create custom tests or panels, allowing you to personalise the system to the way your clinic works.
- Go to > General Settings > IDEXX.
- Click the analyzer you wish the custom test to be associated with.
- On the left, click Add Custom Test under the list of available tests.

- A new test called “custom test 1” will appear after the last test in the list.
- Click on the pencil icon behind “custom test 1” to edit the name.
- Click Apply.
- Click Save at the bottom.
How do I delete a custom test?
- Go to > General Settings > IDEXX.
- Click the analyzer the custom test is associated with.
- Click the delete () icon behind it te remove this test.
- Click Save at the bottom.