Appointments are booked in your calendar throughout the day. In Animana, appointments can be made in several ways: directly from the diary, from the client/patient file, or a client makes an appointment themselves online at your practice (if you are using an online appointment booking system). This article explains how to create an appointment from the diary in Animana.
In the Related Articles section you can find more information about the other topics.
Before you start
- You need permission to be able to use the diary. Permissions can be adjusted by practice administrators in
 > General Settings > Role Management.
 - Make sure that your appointment columns, appointment types and appointment groups have been customised in your account before continuing. See the Learning Path: Diary Management for more information related to this topic.
Step-by-step instructions
- Click on the diary icon in the navigation bar.

-
By default, you will be led to the diary of the location you are currently logged into. If you want to create an appointment for a different location/appointment group (tab), click on the relevant tab first.

- By default, today’s diary will be shown. If you want to create an appointment for a different day, select that day in the calendar on the left-hand side.
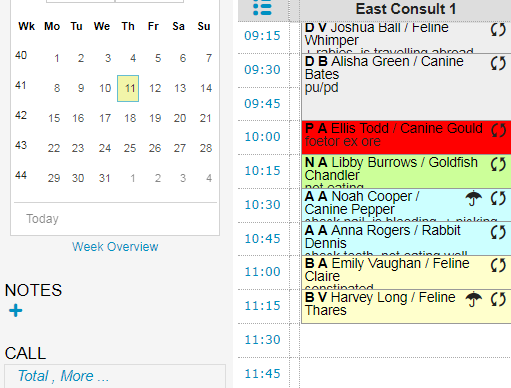
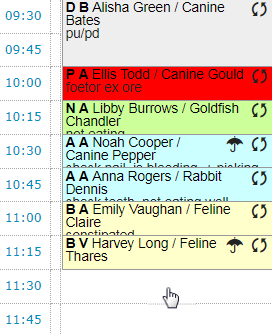
- Click on a time slot in the diary to add an appointment.
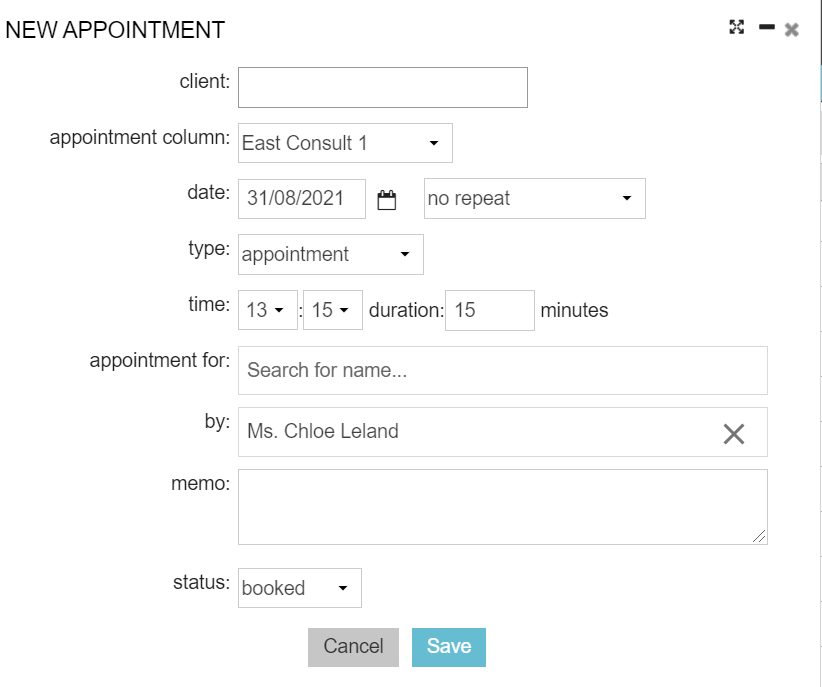
- A pop-up will appear for details of the appointment:
-
Link the appropriate client to the appointment by typing the surname of the client in the “client” field. As soon as you have entered three characters, Animana will show a dropdown with matching names to pick from. Click on the correct client to link it.
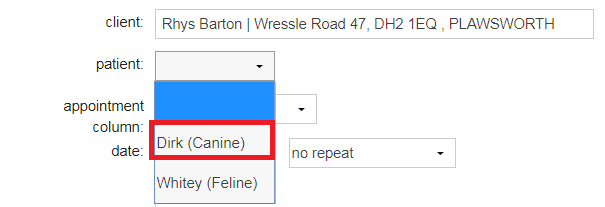
This is box titleIn this example, we want to add an appointment for Mr. Barton.
- Once you have successfully linked a client, you will notice a patient field will appear where you can link a patient to the appointment. Click on the field to open the drop-down and select the correct patient.
- The “appointment column” will show the current column in the diary where you are scheduling this appointment. If changes are needed, click on it to open the drop-down and select the correct appointment column.
- The “date” field will be populated with the date you selected in the diary.
To change the date either type the new date in the correct format (DD-MM-YYYY), or click on the -icon to bring up the date-picker.
 - A “type” of an appointment can be assigned. You can change the appointment type by clicking on it to open the drop-down and select the correct type.
Appointment types have defined descriptions and durations and can be colour coded. They can be defined in > General Settings > Appointment Types.
 - The “time” field will be populated with the time you originally clicked on in the diary. If you want to change it, simply click on the time to select a different one.
- The appointment “duration” field is pre-populated with the duration as defined for the appointment type you have selected. You can manually adjust the duration by entering a new value.
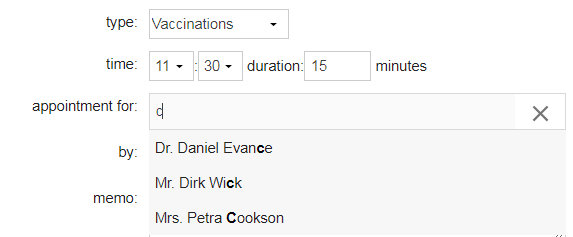
- If you are making an appointment on behalf of another employee, you can assign the appointment to them by entering their name. As soon as you enter one character, Animana will show you a drop-down with matches for you to pick from. Select the colleague you want to assign.
- By default, you will be automatically added as the creator of the appointment in the field “by”. In case you want to change the information, click on the X by your name and enter a different user.

-
You can add a simple memo or text comment to the appointment in the “memo” field.
- Click Save.
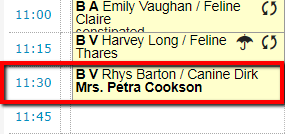
You will return to the diary and your appointment will have been added.
More about this
How can I change the status from the appointment pop up?
The status of the client can be selected from a pre-set list including booked, arrived, in progress, payment, done, and no show. Each state has its own colour, visible in the calendar to others. If you want to change a status, click on the appointment to open the appointment pop up.
- Click on the drop-down next to “status”.
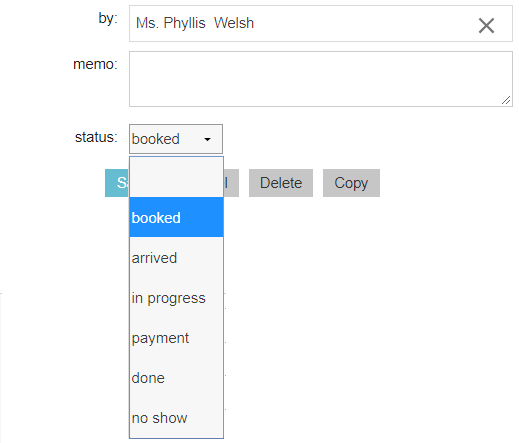
- Select the correct status.
- Click Save.
How do I edit an existing appointment in the diary?
Simply click the appointment you wish to edit in the diary and the edit window will appear for you to adjust whatever you need. Just make sure to click in the appointment box where there isn’t any text.
How to find quick information about an appointment
Just hover your mouse over an appointment in the diary to view additional information about the appointment, including the client address, phone number, patient species, breed, visit address (when available) and also the name of the user who created the appointment.
