To print labels from Animana you need to install a label printer that is network ready and set it up for use with Animana. These settings are local and have to be done on each workstation that you want to use for label printing. The following article explains how to set this up.
Prerequisites
- Workstation + network if more than one workstation.
- Installed label printer + labels.
- Mozilla Firefox web browser.
- Adobe Acrobat Reader.
Installing the label printer
The label printer needs to be installed by you or your IT person before it can be used with your workstation(s). Before continuing with the netxt step, check if the printer is installed properly by printing a test page.
If you need help with installing your label printer please refer to the manual supplied with the printer, check the printer manufacturer’s website or call the printer manufacturer’s support desk!
Setting up printer properties and preferences
After your label printer has been installed and tested, the next step is setting the label printer properties and preferences. This is necessary to make sure it is recognized as the label printer when a label is printed from Animana and to set the size of the labels you are using. For instructions on how to do this please select your printer and follow the steps.
To prevent issues with silent printing or printer selection, there should only be 1 printer per type ‘LABEL’ installed on your computer.
Setting up the browser requirements and ‘one click’ printing
All printed documents in Animana are pdf files printed from the browser. To enable this please follow the steps in these Knowledge Base articles:
Browser requirements and setup
Enabling ‘One Click’ (silent printing)
Setting up label printing in Animana
If all the previous steps are done, the label printer is installed, set up and can be recognized by Animana.
Next you need to enter the Label size in Animana to match the label size that is actually used in the printer. To do this log into Animana as user with full access to change the settings.
- Go to
 > General Settings > General Settings > tab Paper Format.
 - Add your label size in milimeters. Note that label widths from 50-100mm and heights between 25-100mm are supported.
- Click Save.
Make sure you always use the same label size when connecting more than one label printer, Animana only has one setting for label size per account!
Note: In this section you can also set the margins and a label header text (e.g. the practice name and phone number) and font to appear on labels. If you leave the ‘label text’ field empty each label header will contain the (branch) name, address and phone number.
To complete the setup you need to check the default settings in the print preview, so that it follows those settings the next time you silently print. This is a local setting that will be stored on the workstation. Therefore it needs to be set on each workstation used for printing labels.
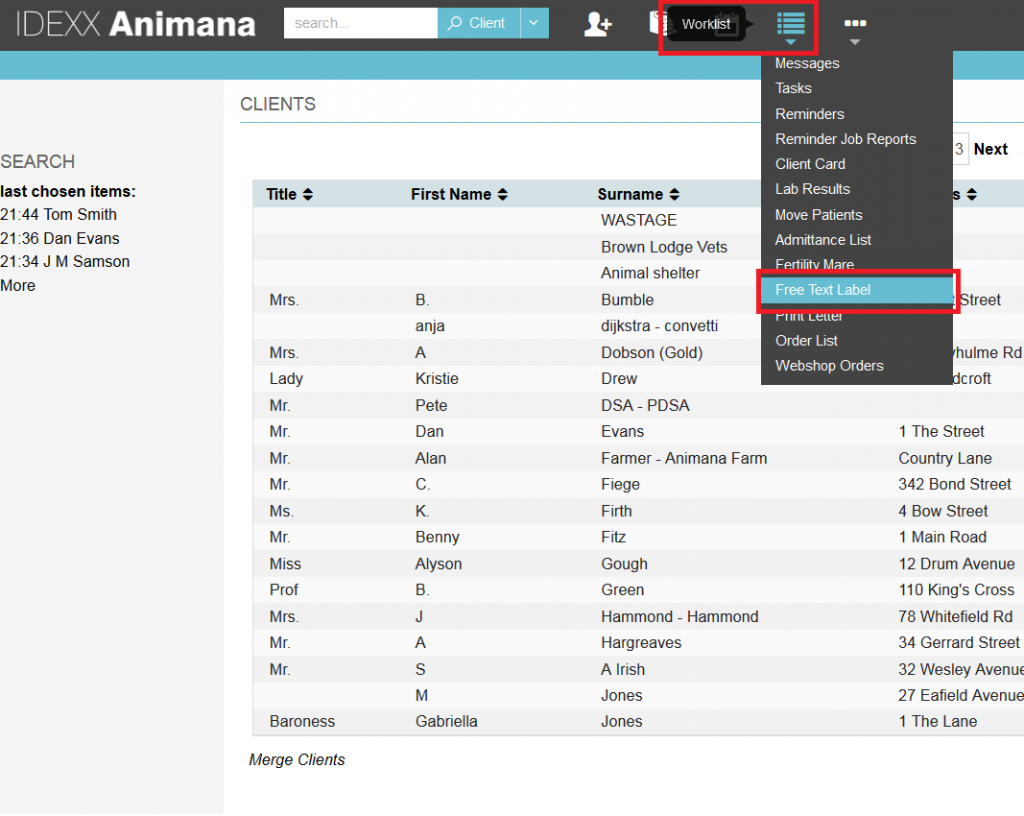
Log into Animana and go to Worklist > Free Text Label.
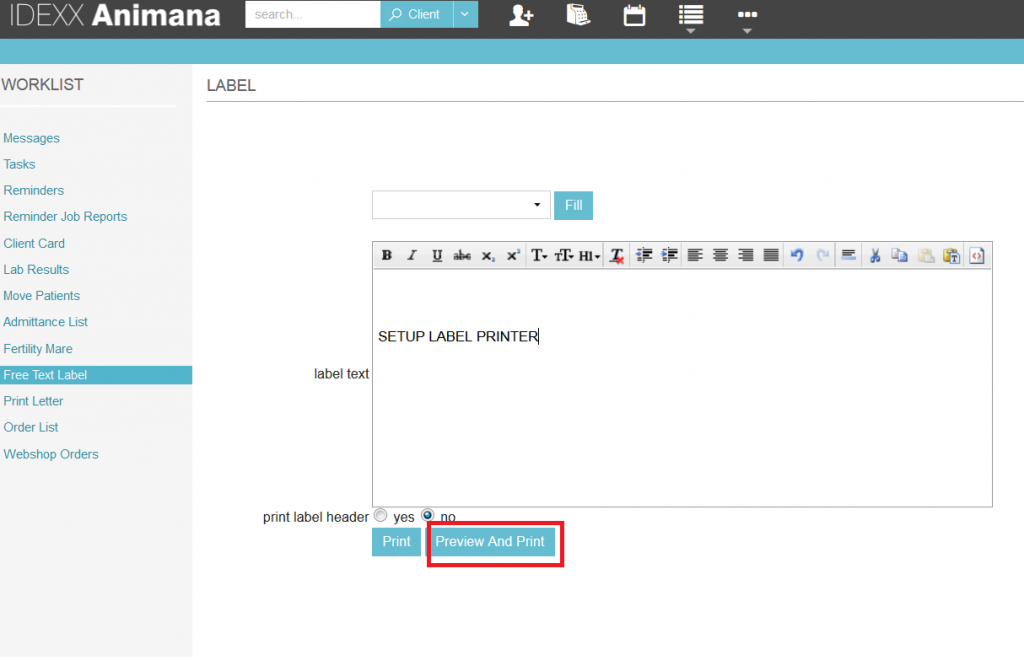
Type a text in the Label and click on Preview and Print.
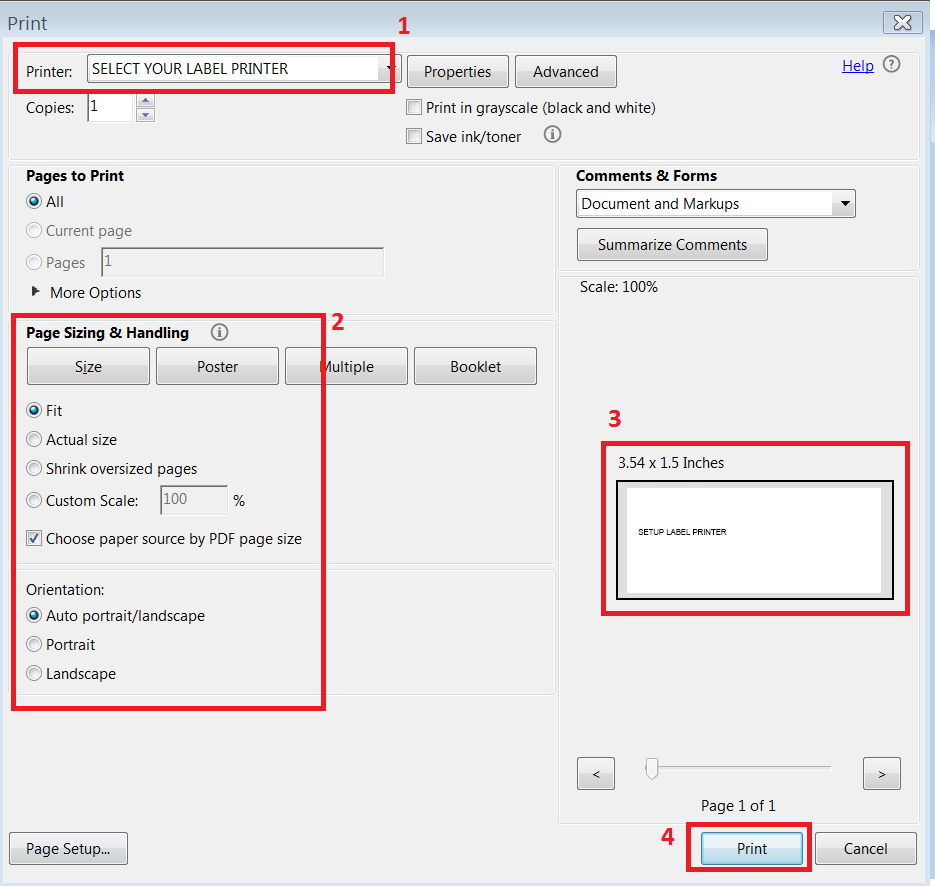
- In the Print options window select the label printer from the dropdown list.
- Select Fit under Page Sizing & Handling.
- Check layout in preview box. If the preview does not look right yet, try the other settings under Page Sizing whilst checking the layout in the preview box.
- Click Print.
What to check if a label does not print okay layout wise
- Margins, font and font size.
- Layout of the specific label: i.e. order of the merge fields and Information pulled in by merge fields.
- You may need to puzzle with these settings to fit the information you want on the label. Keep the label size in mind!