The Label interaction allows you to quickly generate a label in different places in the application.
To manage your labels, go to: ![]() > General Settings > Content Designer > tab Label.
> General Settings > Content Designer > tab Label.
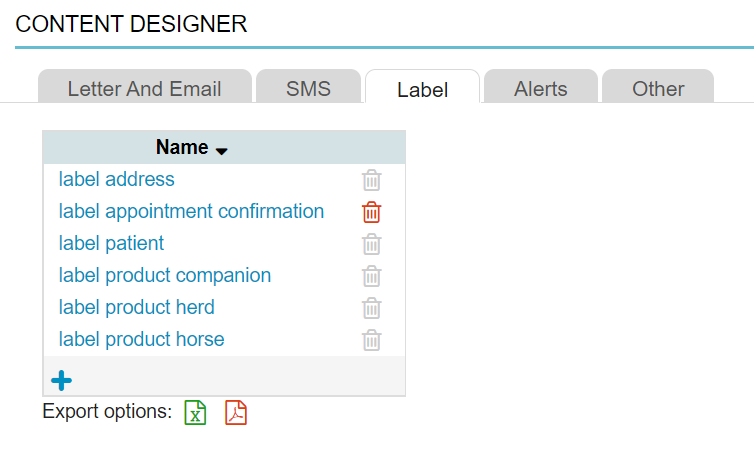
Here you will find pre-defined system labels. System labels are labels that you cannot delete – their recycle bin is greyed out – but you can edit them if you want. If you click ![]() at the bottom of the list you can add a new label.
at the bottom of the list you can add a new label.
Label Product Companion/Herd/Horse
The labels for products entered to a patient file or a herd file usually differ. The herd and horse file product label contains more information, mostly with regards to withdrawal times. The content of these labels can be customized to your wishes in the Content Designer but you cannot delete them. The default values in Animana for the different product labels are as follows:
Label product companion:
${location.fullname}, ${location.number} ${location.street}, ${location.city} ${location.postal_code}
${client.fullname}, ${address.housenumber} ${address.street}, ${address.city} ${address.postal_code}
${invoicedetail.date} ${patient.species} ${patient.name}
${invoicedetail.quantity} ${product.printname}
${invoicedetail.dosage} ${invoicedetail.freetext}
Vet: ${invoicedetail.veterinarian} ${invoicedetail.veterinarian.uniquenumber}
${invoicedetail.registration}
FOR ANIMAL TREATMENT ONLY. KEEP OUT OF REACH OF CHILDREN.
Label product herd:
${invoicedetail.date} Vet: ${invoicedetail.veterinarian} ${invoicedetail.veterinarian.uniquenumber}
${client.companynameorfullname} ${address.housenumber} ${address.street} ${address.city} ${address.county} ${address.postal_code}
${invoicedetail.quantity} ${invoicedetail.name}
CPH: ${herd.ubn} ht: ${herd.type}
wt: ${logbook.withdrawalperiod} ${logbook.registration} batch: ${invoicedetail.batch} EXP: ${invoicedetail.batchexpirydate}
${invoicedetail.dosage} ${invoicedetail.freetext}
FOR ANIMAL TREATMENT ONLY. KEEP OUT OF REACH OF CHILDREN.
Label product horse:
${invoicedetail.date} Vet: ${invoicedetail.veterinarian} ${invoicedetail.veterinarian.uniquenumber}
${client.companynameorfullname} ${address.housenumber} ${address.street} ${address.city} ${address.county} ${address.postal_code}
${invoicedetail.quantity} ${invoicedetail.name}
${patient.name} CPH: ${herd.ubn} ht: ${herd.type}
wt: ${logbook.withdrawalperiod} ${logbook.registration} batch: ${invoicedetail.batch} EXP: ${invoicedetail.batchexpirydate}
${invoicedetail.dosage} ${invoicedetail.freetext}
FOR ANIMAL TREATMENT ONLY. KEEP OUT OF REACH OF CHILDREN.
You can customize the label fields to your wishes. You can also add other fields, such as the ${invoicedetail.registration} field to automatically print the product’s registration number or ${invoicedetail.unit} if you want to add the sales unit to your product label.
Label Address
In the mail address section of the Client Data screen you will see a preview button and a print button for the client address label. This label is a so called system label: it cannot be removed but it can be modified in ![]() > General Settings > Content Designer > tab Label.
> General Settings > Content Designer > tab Label.

The default values in Animana for the client address label are:
${client.title} ${client.fullname}
${address.housenumber} ${address.street}
${address.city}
${address.county}
${address.postal_code}
${address.country}
Label Patient
In the patient file there are several options to print a label:
1) A patient label with all the patient details
This label is printed by clicking the Label button in the patient or herd file. Depending on your settings, you will find this option either in the row of blue action buttons or in the “More actions” drop-down menu at the top left of the patient file.
The content of this label can be customized in the Content Designer, but the label cannot be removed.
By default the label has the following fields:
${client.fullname}, ${address.housenumber} ${address.street}
${address.city} ${address.country} ${address.postal_code}, ${phone.number}
${patient.species} ${patient.name} ${patient.sex} ${patient.weight}
${patient.breed} Born: ${patient.birthdate}
microchip number ${chipnumber}
2) A customised label
This label is printed by clicking the New Label button. Depending on your settings, you will find this option either in the row of blue action buttons or in the “More actions” drop-down menu at the top left of the patient file.
In the new label screen you can then select the appropriate label from the drop-down menu. Note that the labels in the drop-down menu are defined in ![]() > General Settings > Content Designer > tab Label.
> General Settings > Content Designer > tab Label.
The option “print label header” can be checked to print the default label header (configured in ![]() > General Settings > General Settings > Paper Format > Label Text). When no label text is entered, there will be a fall back to the location details set in
> General Settings > General Settings > Paper Format > Label Text). When no label text is entered, there will be a fall back to the location details set in ![]() > General Settings > Locations and Name, HouseNumber, Street , City, Phone number of the current location will be printed instead.
> General Settings > Locations and Name, HouseNumber, Street , City, Phone number of the current location will be printed instead.
More about this
Which merge codes are there?
| Merge code group | Name in Content Designer | Merge code | Information is taken from | Example | Extra information |
|---|---|---|---|---|---|
| Client | Full name | ${client.fullname} | Client Data > an aggregation of the fields "first name" and "surname". | Noah Cooper | |
| Client | Title | ${client.title} | Client Data > field "title". | Dr. | |
| Client | Address title | ${client.title2} | The address title is the written-out form of the "title" field in the Client Data. | doctor | |
| Client | First name | ${client.firstname} | Client Data > field "first name" | Noah | |
| Client | Surname | ${client.lastname} | Client Data > field "surname" | Cooper | |
| Client | Email address | ${client.emailaddress} | Client Data > field "email" | Info@gmail.com | |
| Client | Veterinarian | ${client.vet} | Client Data > field "veterinarian" | veterinarian: Dr. Sebastian Barns | |
| Client | Street | ${address.street} | Client Data > field "street" | Broad Street | |
| Client | House number | ${address.housenumber} | Client Data > field "house number" | 38 | |
| Client | Postcode | ${address.postal_code} | Client Data > field "postcode" | BN27 9UX | |
| Client | City | ${address.city} | Client Data > field "city" | LOWER HORSEBRIDGE | |
| Client | County | ${address.county} | Client Data > field "county" | Hampshire | |
| Client | Country | ${address.country} | Client Data > field "country" | United Kingdom | |
| Client | Telephone | ${phone.number} | Client Data > field "phone". The top phone number with type phone barn/home/office/stable is entered. | +44 7911 123456 | |
| Client | Phone mobile | ${client.mobile} | Client Data > field "phone mobile" | +44 7975 556677 | Only the top mobile number is inserted. |
| Client | Company name | ${client.companyname} | Client Data > field "Company name" | Cooper Incorporated | |
| Client | Personal tax number | ${client.personaltaxnumber} | Client Data > tab Financial > field "personal tax number" | 1645218456 | Due to the sensitivity of this information, you should seek legal advice to determine whether this data can be retained. |
| Client | Birth date | ${client.birthdate} | Client Data > tab Info > field "birth date" | 07/08/78 | Due to the sensitivity of this information, you should seek legal advice to determine whether this data can be retained. |
| Client | Client code | ${client.code} | Client Data > tab Info > field "client code" | AB123 | |
| Client | Distance | ${client.distance} | Client Data > tab Financial > field "distance" | 10.0 | |
| Client | Password | ${client.password} | Client Data > tab Info > field "password" | thisismypassword | |
| Client | Start date | ${client.startdate} | Client Data > tab Info > field "start date" | 05-11-2019 | |
| Client | VAT number | ${client.vatnumber} | Client Data > tab Financial > field "VAT number" | GB123456789 | |
| Client | Website | ${client.website} | Client Data > field "website" | www.coopercorp.co.uk | |
| Client | CPH | ${client.CPH} | Client Data > field "CPH" | 123 | CPH = County Parish Holding. |
| Client | Location | ${client.location} | Client Data > field "client location" | Hawkward Animal Clinic East | Of the location entered in Client data > field "location client", the full name is displayed as entered in Settings > General settings > Locations > [relevant location] > field "full name". |
| Client | IBAN | ${client.iban} | Client Data > tab Financial > field "IBAN" | GB29NWBK60161331926819 | |
| Client | BIC | ${client.bic} | Client Data > tab Financial > field "BIC" | HBUKGB4B | |
| Client | Hidden notes | ${client.hiddennotes} | Client Data > tab Info > field "hidden notes" | Son is also a vet | |
| Client | Visible notes | ${client.visiblenotes} | Client Data > tab Info > field "visible notes" | hearing impaired | |
| Caretaker | If you have caretakers in Animana, always use these caretaker merge codes (instead of the owner's). If a caretaker is assigned to a herd/patient, the caretaker's information is automatically used. If there is no caretaker, then the owner's information is used. | ||||
| Caretaker | Company name | ${caretakerorclient.companyname} | Client Data > field "Company name" of the caretaker. | Taking Care of Your Animals | Caretaker/owner details. |
| Caretaker | Full name | ${caretakerorclient.fullname} | Client Data > an aggregation of the fields "first name" and "surname". | Sally Jones | Caretaker/owner details. |
| Caretaker | Title | ${caretakerorclient.title} | Client Data > field "title". | Mrs. | Caretaker/owner details. |
| Caretaker | Address title | ${caretakerorclient.title2} | The address title is the written-out form of the "title" field in the Client Data. | Mrs. | Caretaker/owner details. It is not possible to edit the address title. |
| Caretaker | First name | ${caretakerorclient.firstname} | Client Data > field "first name" | Sally | Caretaker/owner details. |
| Caretaker | Surname | ${caretakerorclient.lastname} | Client Data > field "surname" | Jones | Caretaker/owner details. |
| Caretaker | Veterinarian | ${caretakerorclient.vet} | Client Data > field "veterinarian" | veterinarian: Dr. Daniel Evance | Caretaker/owner details. |
| Caretaker | Street | ${caretakerorclient.street} | Client Data > field "street" | Main Road | Caretaker/owner details. |
| Caretaker | House number | ${caretakerorclient.housenumber} | Client Data > field "house number" | 49 | Caretaker/owner details. |
| Caretaker | Postcode | ${caretakerorclient.zipcode} | Client Data > field "postcode" | SE94DS | Caretaker/owner details. |
| Caretaker | City | ${caretakerorclient.city} | Client Data > field "city" | Mottingham | Caretaker/owner details. |
| Caretaker | County | ${caretakerorclient.county} | Client Data > field "county" | Yorkshire | Caretaker/owner details. |
| Caretaker | Country | ${caretakerorclient.country} | Client Data > field "country" | United Kingdom | Caretaker/owner details. |
| Caretaker | Client code | ${caretakerorclient.code} | Client Data > tab Info > field "client code" | TKOYA1 | Caretaker/owner details. |
| Caretaker | Distance | ${caretakerorclient.distance} | Client Data > tab Financial > field "distance" | 15.5 | Caretaker/owner details. |
| Caretaker | Mobile | ${caretakerorclient.mobile} | Client Data > field "phone mobile" | +44 20 7123 4568 | Caretaker/owner details. |
| Caretaker | Start date | ${caretakerorclient.startdate} | Client Data > tab Info > field "start date" | 09-07-2021 | Caretaker/owner details. |
| Caretaker | VAT number | ${caretakerorclient.vatnumber} | Client Data > tab Financial > field "VAT number" | GB123456780 | Caretaker/owner details. |
| Caretaker | Website | ${caretakerorclient.website} | Client Data > field "website" | www.takingcareofyouranimals.com | Caretaker/owner details. |
| Patient | All patient merge codes can only be used from the patient file, for patient appointments or product reminders in the patient file. | ||||
| Patient | Name | ${patient.name} | Patient Data > field "name" | Pepper | |
| Patient | Code | ${patient.code} | Patient Data > field "patient number" | 00008 | |
| Patient | Species | ${patient.species} | Patient Data > field "species" | Canine | |
| Patient | Breed | ${patient.breed} | Patient Data > field "breed" | Labrador Retriever | |
| Patient | Birth date | ${patient.birthdate} | Patient Data > field "born on" | 02-03-2015 | |
| Patient | Age | ${patient.age} | Age is calculated using the "born on" field. There is no dedicated field for age. | 9 years and 3 months | |
| Patient | Date of death | ${patient.deathdate} | Patient Data > field "died on" | ||
| Patient | Gender | ${patient.sex} | Patient Data > field "gender" | male neutered | |
| Patient | Colour | ${patient.color} | Patient Data > field "colour" | brown | |
| Patient | Fur | ${patient.fur} | Patient Data > field "fur" | shorthair | |
| Patient | Descent | ${patient.descent} | Patient Data > field "descent" | ||
| Patient | Usage of animal | ${patient.usage} | Patient Data > field "usage of animal" | ||
| Patient | Insurance number | ${patient.insurancenumber} | Patient Data > Patient data > field behind the "insurance" field | 123345667 | |
| Patient | Veterinarian | ${patient.vet} | Patient Data > field "veterinarian" | veterinarian: Mr. Nathan Gibson | |
| Patient | Attachment | ${attachmentname} | patient.pdf | ||
| Patient | Insurance | ${patient.insurancename} | Patient Data > field "insurance" | PetPlan | |
| Patient | Height | ${patient.size} | Patient Data > field "height" | 30.0 cm | |
| Patient | Hidden notes | ${patient.hiddennotes} | Patient Data > field "" | travelled to France in 2021 | |
| Patient | Visible notes | ${patient.visiblenotes} | Patient Data > field "" | THTH | |
| Patient | Nominative pronoun (he/she/(s)he) | ${patient.nominativepronoun} | Pronoun is determined according to the gender entered. | he | |
| Patient | Posessive pronoun (his/her/their) | ${patient.posessivepronoun} | Pronoun is determined according to the gender entered. | his | |
| Patient | Accusative pronoun (him/her/them) | ${patient.accusativepronoun} | Pronoun is determined according to the gender entered. | him | |
| Patient --> identifications | Number | ${identification.number} | Patient Data > field "number" | 977200000000000 | |
| Patient --> identifications | Description | ${identification.description} | Patient Data > field "Description" | microchip number | |
| Patient --> identifications | Microchip number | ${patient.transponder} | Patient Data > field "number" belonging to description = microchip number | 977200000000000 | |
| Patient --> identifications | Pedigree number | ${patient.pedigreenumber} | Patient Data > field "number" belonging to description = pedigree number | ||
| Patient --> identifications | Ringnumber | ${patient.ringnumber} | Patient Data > field "number" belonging to description = ringnumber | GBA 1234 | |
| Patient --> identifications | Burning | ${patient.burning} | Patient Data > field "number" belonging to description = burning | ||
| Patient --> identifications | Studnumber | ${patient.studnumber} | Patient Data > field "number" belonging to description = studnumber | ||
| Patient --> identifications | Tattoo | ${patient.tattoo} | Patient Data > field "number" belonging to description = tattoo | ||
| Patient --> identifications | Other | ${patient.id.other} | Patient Data > field "number" belonging to description = other | ||
| Patient --> identifications | Passport | ${patient.passport} | Patient Data > field "number" belonging to description = passport | GB339367 | |
| Patient --> identifications | Life number | ${patient.lifenumber} | Patient Data > field "number" belonging to description = life number | ||
| Patient --> identifications | Identifications | ${patient.identifications} | Patient Data > all number fields belonging to all entered descriptions | microchip number: 977200000000000 passport: GB339367 | |
| Patient --> last weight | Weight | ${patient.lastweight.weight} | Patient File > last weight that was entered | 27.5 kg | |
| Patient --> last weight | Date | ${patient.lastweight.date} | Patient File > date of the last weight | 05-06-2024 | |
| Patient --> last weight | Notes | ${patient.lastweight.notes} | Patient File > Notes entered for last weight | ||
| Patient --> last weight | Body score | ${patient.lastweight.bodyscore} | Patient File > body score of last weight | 6 | |
| Reminder | Date | ${reminder.date} | Patient File > Reminder > field "due date" | 21-06-2024 | |
| Reminder | Text | ${reminder.text} | Patient File > Reminder > field "reminder text" | annual health check and vaccination | |
| Reminder | Type | ${reminder.type} | Patient File > Reminder > field "reminder type" | Vaccination | |
| Appointment | All appointment codes can be used via Diary > 3 dots and 3 lines at the top of time column on the left, via the buttons behind the appointment in the client and patient/herd file and via automated appointment reminders. | ||||
| Appointment | Time | ${appointment.time} | Diary > Appointment > field "time" | 17:00 | To be used for (automated) appointment reminders. |
| Appointment | Date | ${appointment.date} | Diary > Appointment > field "date" | 31-12-2024 | To be used for (automated) appointment reminders. |
| Appointment | Appointment for | ${appointment.for} | Diary > Appointment > field "time" | Dr. Sebastian Barns | To be used for (automated) appointment reminders. |
| Appointment | Type | ${appointment.type} | Diary > Appointment > field "type" | appointment | To be used for (automated) appointment reminders. |
| Appointment | Appointment column | ${appointment.book} | Diary > Appointment > field "appointment column" | East Consult 1 | To be used for (automated) appointment reminders. |
| Appointment | Location name | ${appointment.location.name} | Diary > Appointment > “in” field. The details of the location entered there are shown exactly as they are stored in Settings > General Settings > Locations > “name” field. | East Street Hospital | To be used for (automated) appointment reminders. |
| Appointment | Location full name | ${appointment.location.fullname} | Diary > Appointment > “in” field. The details of the location entered there are shown exactly as they are stored in Settings > General Settings > Locations > “full name” field. | Hawkward Animal Clinic East | To be used for (automated) appointment reminders. |
| Appointment | Location street | ${appointment.location.street} | Diary > Appointment > “in” field. The details of the location entered there are shown exactly as they are stored in Settings > General Settings > Locations > “street” field. | Berner St. | To be used for (automated) appointment reminders. |
| Appointment | Location house number | ${appointment.location.housenumber} | Diary > Appointment > “in” field. The details of the location entered there are shown exactly as they are stored in Settings > General Settings > Locations > “house number” field. | 56 | To be used for (automated) appointment reminders. |
| Appointment | Location postcode | ${appointment.location.zipcode} | Diary > Appointment > “in” field. The details of the location entered there are shown exactly as they are stored in Settings > General Settings > Locations > “postcode” field. | IP1 3LU | To be used for (automated) appointment reminders. |
| Appointment | Location city | ${appointment.location.city} | Diary > Appointment > “in” field. The details of the location entered there are shown exactly as they are stored in Settings > General Settings > Locations > “name” field. | Ipswich | To be used for (automated) appointment reminders. |
| Appointment | Location telephone | ${appointment.location.phone} | Diary > Appointment > “in” field. The details of the location entered there are shown exactly as they are stored in Settings > General Settings > Locations > “phone” field. | +44 7700 900077 | To be used for (automated) appointment reminders. |
| Appointment | Location email | ${appointment.location.email} | Diary > Appointment > “in” field. The details of the location entered there are shown exactly as they are stored in Settings > General Settings > Locations > “email” field. | info@hac-east.co.uk | To be used for (automated) appointment reminders. |
| Invoice | Invoice date | ${invoice.date} | Client File > Sales invoice > field "invoicedate" | 20-11-2023 | To be used in client file and debtors. Not for use with Debtors (New). |
| Invoice | Invoice number | ${invoice.number} | Client File > Sales invoice > field "invoice number" | S-2023-0038 | To be used in client file and debtors. Not for use with Debtors (New). |
| Invoice | Invoice total amount | ${invoice.totalamount} | Client File > Sales invoice > field "total invoice" | £ 73.00 | To be used in client file and debtors. Not for use with Debtors (New). |
| Invoice | Invoice paid amount | ${invoice.paidamount} | Client File > Sales invoice > tab Payments > field "amount" | £ 20.00 | To be used in client file and debtors. Not for use with Debtors (New). |
| Invoice | Invoice open amount | ${invoice.openamount} | The outstanding amount of the invoice. This is calculated by reducing the total invoice amount by any partial payments. | £ 53.00 | To be used in client file and debtors. Not for use with Debtors (New). |
| Invoice | Last resent date | ${invoice.lastresentdate} | Client File > Sales invoice > tab Reminders > field "date" | 31-11-2023 | To be used in client file and debtors. Not for use with Debtors (New). |
| Invoice | Last resent amount | ${invoice.lastresentamount} | Client File > Sales invoice > field "amount" | £ 53.00 | To be used in client file and debtors. Not for use with Debtors (New). |
| Invoice | Invoice location | ${invoice.location} | The location that was logged into when the invoice was created. | East Street Hospital | To be used in client file and debtors. Not for use with Debtors (New). |
| Invoice | Invoice block | ${invoicesblock} | This code generates a table listing all open invoices with the following information: invoice date, invoice number, invoice amount, paid amount, added costs, number of days the invoice is open, number of reminders sent, open amount per invoice, total of all open invoices combined. | Only to be used in Debtors (New). Not to be used in client file and debtors. | |
| Invoice | Invoice block open amount | ${invoicesblock.openamount} | Total amount of all outstanding invoices from the invoice block combined. | £ 837.89 | Only to be used in Debtors (New). Not to be used in client file and debtors. |
| Invoice | Invoice detail date | ${invoicedetail.date} | Patient/herd file > product line > field "date" | 06-06-2024 | Only to be used on a product label. |
| Invoice | Invoice detail quantity | ${invoicedetail.quantity} | Patient/herd file > product line > field "quantity" | 10.0 | Only to be used on a product label. |
| Invoice | Invoice detail dosage | ${invoicedetail.dosage} | Patient/herd file > product line > field "dosage" | 1 tablet once a day | Only to be used on a product label. |
| Invoice | Invoice detail name | ${invoicedetail.name} | Patient/herd file > product line > field "product invoice text" | Amoxibactin tablets 50mg | Only to be used on a product label. |
| Invoice | Invoice detail free text | ${invoicedetail.freetext} | Patient/herd file > product line > field "label" | shake before use | Only to be used on a product label. |
| Invoice | Invoice detail batch | ${invoicedetail.batch} | Patient/herd file > product line > field "batch" | 7A224B | Only to be used on a product label. |
| Invoice | Invoice detail batch expiry date | ${invoicedetail.batchexpirydate} | Patient/herd file > product line > field "expiration" | 01-01-2026 | Only to be used on a product label. |
| Invoice | Invoice detail logbook application | ${invoicedetail.logbookapplication} | Herd file > product line > tab withdrawal time > field "application" | intra muscular | Only to be used on a product label. |
| Invoice | Invoice detail veterinarian name | ${invoicedetail.veterinarian} | This is the prescribing vet of the medication entered at: Patient/Herd file > product line > field "veterinarian" | Vet: Mr. Nathan Gibson | Only to be used on a product label. |
| Invoice | Invoice detail veterinarian UDN | ${invoicedetail.veterinarian.uniquenumber} | Patient/Herd file > product line > field "veterinarian" | 1002112 | UDN = Veterinary Professional Number. This number is entered in: Settings > General Settings > User Management > User > field "Veterinary Professional Number:". You can only use this merge code on a product label. |
| Invoice | Invoice detail invoice text | ${invoicedetail.invoicetext} | Patient/Herd file > product line > field "product invoice text" | Euthanasia dog | Only to be used on a product label. |
| Invoice | Registration | ${invoicedetail.registration} | Herd file > product line > tab withdrawal time > field "registration" | Only to be used on a product label. | |
| Invoice | Invoice detail sales unit | ${invoicedetail.unit} | Patient/Herd file > product line > unit named behind the price box | Set via Extra > Products > Products > Product tab > field "sales unit". You can only use this merge code on a product label. | |
| Herd | Herd CPH | ${herd.ubn} | If completed: Herd data > field "CPH". If empty: Client data > field "CPH". | 123 | CPH = County Parish Holding. |
| Herd | Herd type | ${herd.type} | Herd Data > field "herd type" | beef - finisher | |
| Herd | Withdrawal periods | ${logbook.withdrawalperiod} | Herd file > product line > tab withdrawal time > field "withdrawal time" | ||
| Herd | Registration | ${logbook.registration} | Herd file > product line > tab withdrawal time > field "registration" | ||
| Herd | Pharmaceutical form | ${logbook.pharmaceuticalform} | Extra > Products > Products > Product Info tab > field "pharmaceutical form" | Oral drops, emulsion | |
| Herd | Active ingredient(s) and concentration | ${logbook.activeingredientsandconcentration} | Extra > Products > Products > Product Info tab > field "active ingredient(s) and concentration" | ampicilline 100 mg/ml | |
| Herd | Duration | ${logbook.duration} | The field "duration". Patient/Herd file > product line > tab withdrawal time > field "duration" | ||
| Location | The location inserted depends on the location the user is logged in to. In some cases, the location registered with the data is used. For example, reminders are sent with data from the location where the reminder was created. | ||||
| Location | Name | ${location.name} | Settings > General Settings > Locations > field "name" | East Street Hospital | |
| Location | Full name | ${location.fullname} | Settings > General Settings > Locations > field "full name" | Hawkward Animal Clinic East | |
| Location | Street | ${location.street} | Settings > General Settings > Locations > field "street" | Berner St. | |
| Location | House number | ${location.number} | Settings > General Settings > Locations > field "house number" | 56 | |
| Location | Postcode | ${location.postal_code} | Settings > General Settings > Locations > field "Postcode" | IP1 3LU | |
| Location | City | ${location.city} | Settings > General Settings > Locations > field "city" | Ipswich | |
| Location | Country | ${location.country} | Settings > General Settings > Locations > field "country" | United Kingdom | |
| Location | County | ${location.county} | Settings > General Settings > Locations > field "county" | ||
| Location | Province | ${location.province} | Settings > General Settings > Locations > field "province" | This field is only available for countries where the province is used in address information, such as Canada. | |
| Location | State | ${location.state} | Settings > General Settings > Locations > field "state" | This field is only available for countries with states, such as the United States of America. | |
| Location | Telephone | ${location.phone} | Settings > General Settings > Locations > field "phone" | +44 7700 900077 | |
| Location | Fax | ${location.fax} | Settings > General Settings > Locations > field "fax" | +44 7700 900078 | |
| Location | ${location.email} | Settings > General Settings > Locations > field "email" | info@hac-east.co.uk | ||
| Location | Bank account | ${location.bankaccount} | Settings > General Settings > Locations > field "bank account" | ||
| Referring vet | Codes for a referring veterinarian only work if a referring veterinarian has been set up. These codes work in the client and patient/herd file. | ||||
| Referring vet | Full name | ${referringvet.fullname} | Client Data of the referring vet > an aggregation of the fields "first name" and "surname". | ||
| Referring vet | Title | ${referringvet.title} | Client Data of the referring vet > field "title" | Dr. | |
| Referring vet | Address title | ${referringvet.title2} | The address title is the written-out form of the "title" field in the Client Data of the referring vet. | doctor | |
| Referring vet | First name | ${referringvet.firstname} | Client Data of the referring vet > field "first name" | Sebastian | |
| Referring vet | Surname | ${referringvet.lastname} | Client Data of the referring vet > field "" | Barns | |
| Referring vet | Email address | ${referringvet.emailaddress} | Client Data of the referring vet > field "email" | Info@practice.co.uk | |
| Referring vet | Street | ${referringvet.address.street} | Client Data of the referring vet > field "street" | Worm Street | |
| Referring vet | House number | ${referringvet.address.housenumber} | Client Data of the referring vet > field "house number" | 10 | |
| Referring vet | Postcode | ${referringvet.address.zipcode} | Client Data of the referring vet > field "postcode" | HG4 5QZ | |
| Referring vet | City | ${referringvet.address.city} | Client Data of the referring vet > field "city" | MASHAM | |
| Referring vet | County | ${referringvet.address.county} | Client Data of the referring vet > field "county" | North Yorkshire | |
| Referring vet | Country | ${referringvet.address.country} | Client Data of the referring vet > field "country" | United Kingdom | |
| Referring vet | Client code | ${referringvet.code} | Client Data of the referring vet > field "client code" | SB123 | |
| Referring vet | Distance | ${referringvet.distance} | Client Data of the referring vet > tab Financial > field "distance" | 11.0 | |
| Referring vet | Mobile | ${referringvet.mobile} | Client Data of the referring vet > field "phone mobile" | ||
| Referring vet | Start date | ${referringvet.startdate} | Client Data of the referring vet > tab Info > field "start date" | 23-06-2020 | |
| Referring vet | CPH | ${referringvet.ubn} | Client Data of the referring vet > field "CPH" | 1654 | CPH = County Parish Holding. |
| Referring vet | VAT number | ${referringvet.vatnumber} | Client Data of the referring vet > tab Financial > field "VAT number" | GB123456789 | |
| Referring vet | Website | ${referringvet.website} | Client Data of the referring vet > field "website" | www.practice.co.uk | |
| Referring vet | Company name | ${referringvet.companyname} | Client Data of the referring vet > field "Company name" | Veterinary Practice | |
| Logbook address | Street | ${logbookaddress.street} | Client Data > field "street" of the caretaker | Wressle Road | Visible when a caretaker is assigned to a herd. |
| Logbook address | House number | ${logbookaddress.housenumber} | Client Data > field "house number" of the caretaker | 47 | Visible when a caretaker is assigned to a herd. |
| Logbook address | Postcode | ${logbookaddress.zipcode} | Client Data > field "postcode" of the caretaker | DH2 1EQ | Visible when a caretaker is assigned to a herd. |
| Logbook address | City | ${logbookaddress.city} | Client Data > field "city" of the caretaker | PLAWSWORTH | Visible when a caretaker is assigned to a herd. |
| Logbook address | County | ${logbookaddress.county} | Client Data > field "county" of the caretaker | Durham | Visible when a caretaker is assigned to a herd. |
| Logbook address | Country | ${logbookaddress.country} | Client Data > field "country" of the caretaker | United Kingdom | Visible when a caretaker is assigned to a herd. |
| User | Merge codes for employees always use the data of the logged-in user. | ||||
| User | Full name | ${employee} | Settings > General Settings > User Management > User > an aggregation of the fields "first name" and "surname". | Chloe Leland | |
| User | Unique Vet Number | ${user.veterinaryprofessionalnumber} | Settings > General Settings > User Management > User > an aggregation of the field "Veterinary Professional Number" | 1002112 | |
| Other | Empty line | ${empty.line} | This code inserts an empty line | ||
| Other | Time now | ${time} | This code inserts the current time | 16:53 | |
| Other | Date now | ${date} | This code inserts the current date | 10-06-2024 |