
The General Settings area of IDEXX Animana allows you to configure the basics of your practice. Only the administrator of your account can adjust the general settings. Within the general settings there are specific settings for the users of your system.
User Management
Settings > General Settings > User Management
Adding a new user: How do I add a user?
Editing an existing user: How do I edit a user?
How to add an IP address to a user
If you have enabled IP checking and wish to add a new IP address to one or more users, go to Settings > General Settings > User Management and at the bottom of the list of users click on add ip-address.
You will now be shown a list of all users and their recent IP addresses from which they have accessed Animana. For each user you can see immediately whether check on ip is enabled or disabled. You can also see if a user is active or not.
At the top of the screen, enter the IP address you would like to add (note that your current IP address will be automatically completed). You may then select to add this IP address to either all users or to an individual user – select your choice from the dropdown list and click save to add the IP address.
User Group Management
Settings > General Settings > User Group Management
For easier account management you can create user groups. User groups are a collection of users, e.g. veterinarians, assistants, reception within your Animana account.
For more information see: How do I set up user groups?
Role Management
Settings > General Settings > Role Management
A newly created user will be able to fully access every part of Animana. If these users are not meant to have full access you will need to change the permissions for their role. In order to restrict access browse to the “Role Management” page, on this page you will be able to disable permissions that prevent unwanted access to specific parts of certain users in your Animana account. Please continue reading to learn how to create Roles with the appropriate permissions for the employees in your clinic.
Note that the the Roles can be assigned to the users by accessing Settings > General Settings > User Management.
Adding a new role
For more information see: How do I create user roles with specific permissions in Animana?
Editing role permissions
Each row represents an area of the Animana system for which you can control access permissions. A green and open padlock represents that the role has permission to access and change this area, a red and closed padlock shows that the role does not have permission in this area. To toggle between the two permissions, simply click the icon.
Permissions
| Name of permission | Description |
|---|---|
| Full access | The ability to access all administration settings such as user management and creation. Be careful: this permission automatically gives access to all other permissions, even when they have a red and closed padlock for a role. |
| Delete client/patient data | The ability to modify entries in client and patient records and permission to delete client and patient records. Once a client has invoices or patients added to them they cannot be deleted, not even if you have full access to the system. |
| Edit invoice/payment | Permission to edit payments. You can edit the payment details of an invoice on the day of the payment only. If you have this permission you can edit previous payments as well. |
| Delete payment | Permission to delete payments. Only if permission is granted, you can delete payments. |
| Add sale items/invoices | The ability to register sales and create invoices. Note: excludes the ability to adjust prices, surcharge or to provide discounts. |
| Adjust price/surcharge/discount sale items | The ability to register sales and create invoices, including the ability to adjust prices, surcharge and provide discounts. |
| Override product invoice text of sale items | The ability to customise a product's default invoice text at the time of adding the product. |
| Mailing | Permission to create and send mailings. |
| Standard texts (letter, email, label) | Permission to add, edit and delete standard texts for e-mails, letters and labels. |
| Reminders | Permission to manage reminders. |
| Reports | Permission to see reports. Give permission to whoever is managing your stock. Note: this will also give them permission to view some of the financial reports. |
| Products | Permission to manage product info and price. |
| Stock | Permission to manage stock. |
| Full access to financial | Ability to enter financial information and access balance and profit/loss account. |
| Financial – debtors | Permission to see and manage debtors. |
| Financial – entry invoices | Permission for entry of purchase invoices. |
| Financial – entry cash/bank | Permission for entry of cash/bank transactions. |
| Financial – monthly accounts | Manage the access to the monthly accounting. |
| Financial - Day overview list | Permission to view day overview list. |
| Financial - Day overview | Permission to create and see day overviews. |
| Financial - Day overview / book receipt/withdrawal | Permission to book a cash withdrawal. |
| Financial - Day overview / book receipt | Permission to book a receipt. |
| Appointments | This permission gives access to view all appointments and schedules. |
| Delete appointment | Right to delete appointments. |
| Scheduling | Permission to manage employee scheduling. |
| Custom protocols | Permission to add, edit and delete custom protocols. |
| AI features | Access to AI-powered features. Additional charges may apply. |
To delete a role, scroll to the bottom of the list and click the recycle bin icon beneath the appropriate column.
Scheduling Types
Settings > General Settings > Scheduling Types
Click on New Scheduling Type to add a new one. You can make several scheduling types, which you can use for scheduling. For instance, you can add schedule types for holidays and shifts.
User Settings
Settings > User Settings
Change password
Settings > User Settings > Change Password
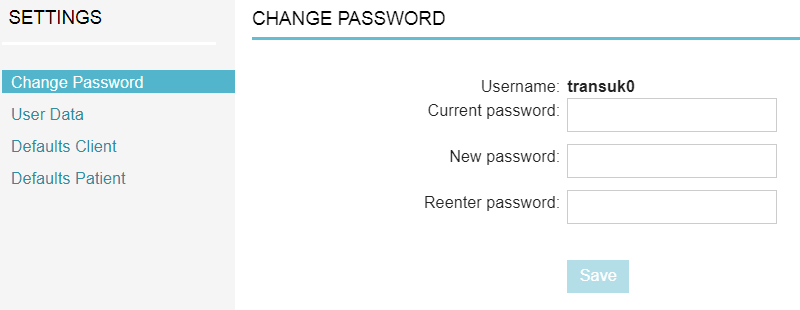
To change your user password enter your current password once and your new password twice.
Passwords must be at least ten (10) characters long, contain at least one (1) capital case letter (A-Z), contain a least one (1) special character (!@#$%^&*()_+|~-\`{}[]:”;'<>/) and contain at least one (1) digit (0-9).
Note: administrators can also change user passwords via Settings > General Settings > User Management.
User data
Settings > User Settings > User Data
For more information see: How do I edit my user data in Animana?
Defaults new contact
Settings > User Settings > Defaults New Contact
This screen allows you to set personal default preferences for when you create new clients. The settings here are especially useful to save time if you regularly enter clients with similar details. Usually, you would initially set a default country and set the type of contact to client.
Defaults new patient
Settings > User Settings > Defaults New Patient
This screen allows you to set personal default preferences for when you create new patients. The settings here are especially useful to save time if you regularly add similar patients.
Patient & herd file settings
Settings > User Settings > Patient & Herd File Settings
This screen allows you to customise the default view of patient and herd files in Animana to your preference by setting the filter options of these files differently.
For more information see: How do I adjust the default view of the patient file and herd file?
Push notifications
Settings > User Settings > Push Notifications
This screen allows you to specify whether you want to receive pop-up notifications. The notifications will appear in the upper-right corner of Animana and will disappear automatically after a few seconds. The following push notifications are available:
- New message received
- Patient arrived
- Task assigned